BRIQUE

💬 Feedback
FR
👤 My account

Less screen,
more genius.

The gift we build together and invent for ourselves.

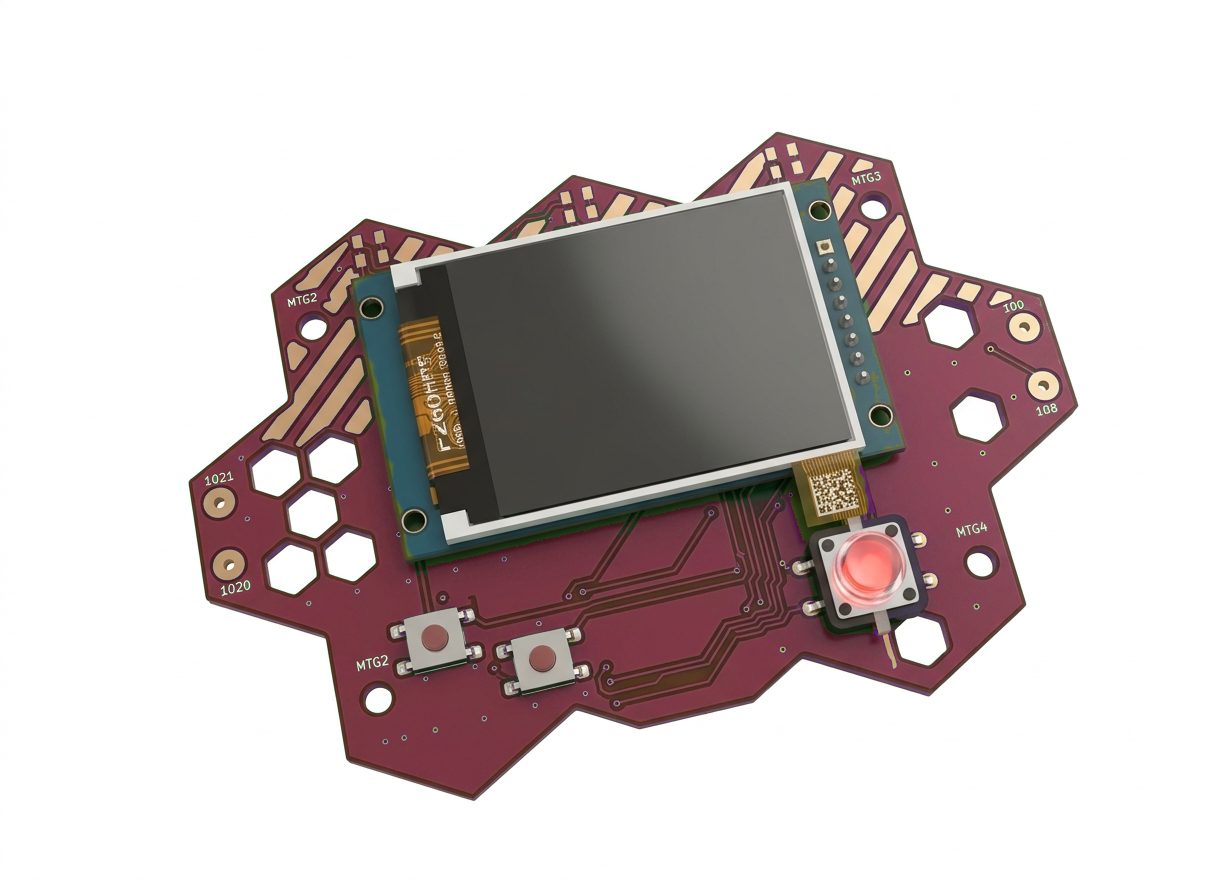
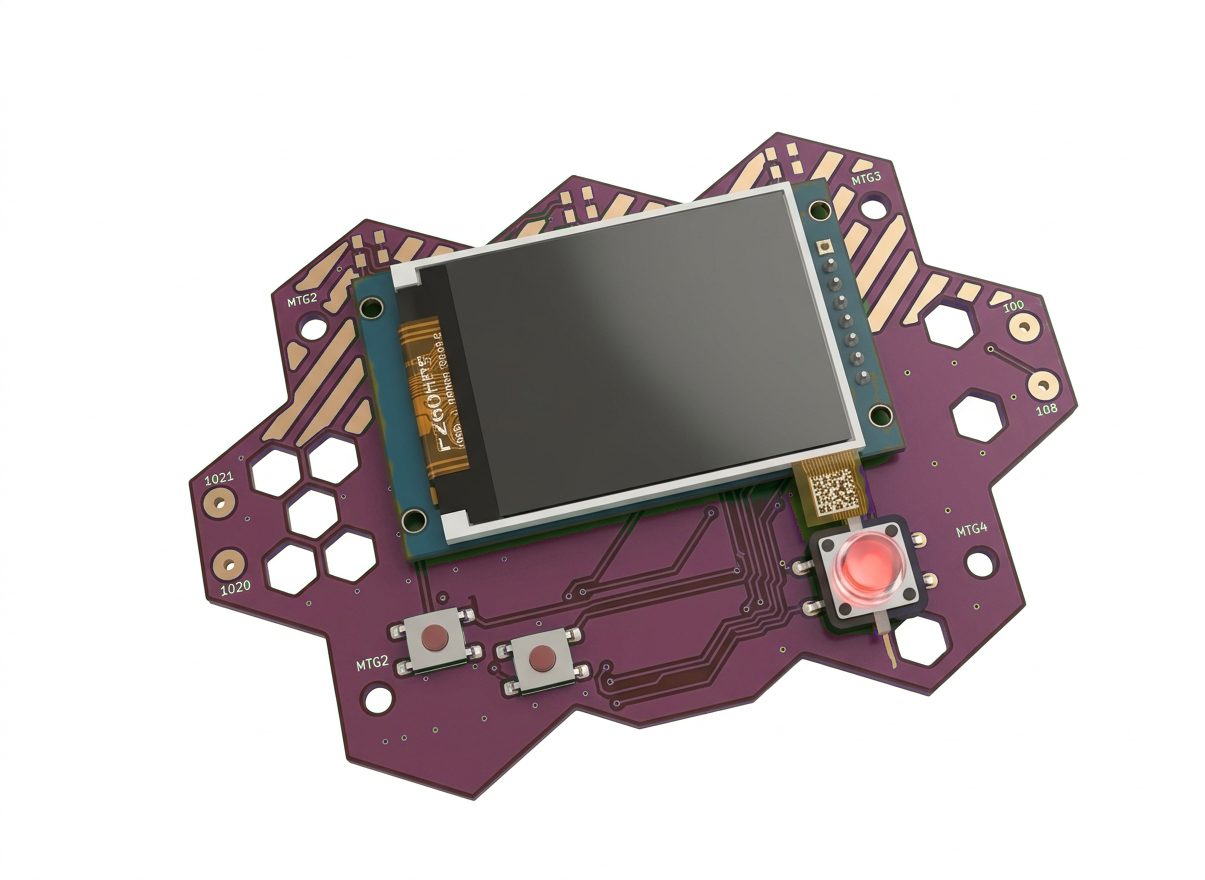
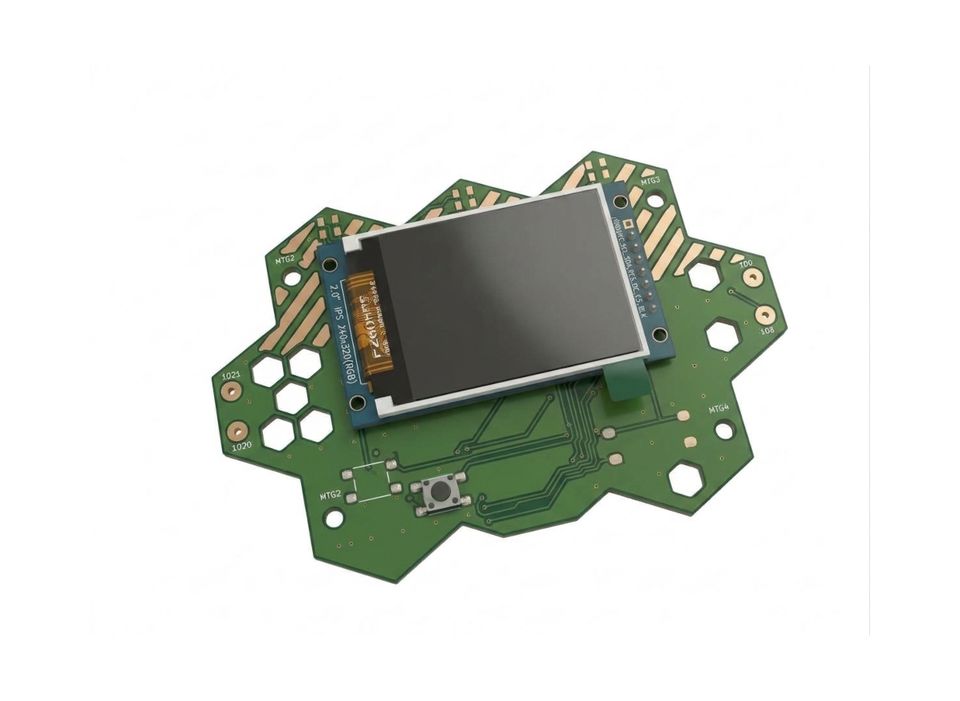
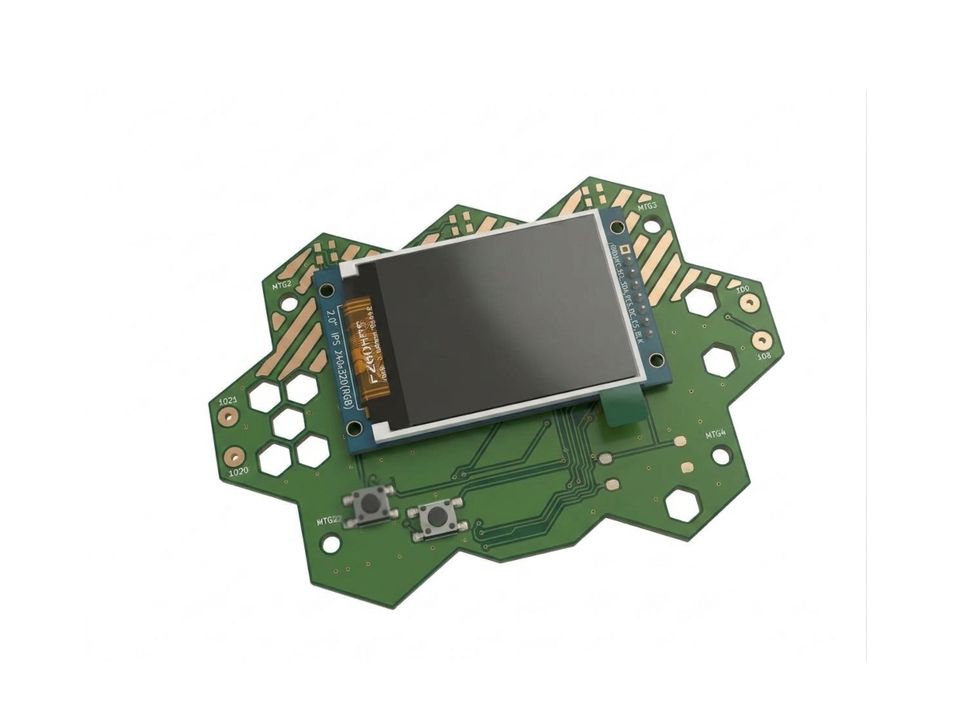
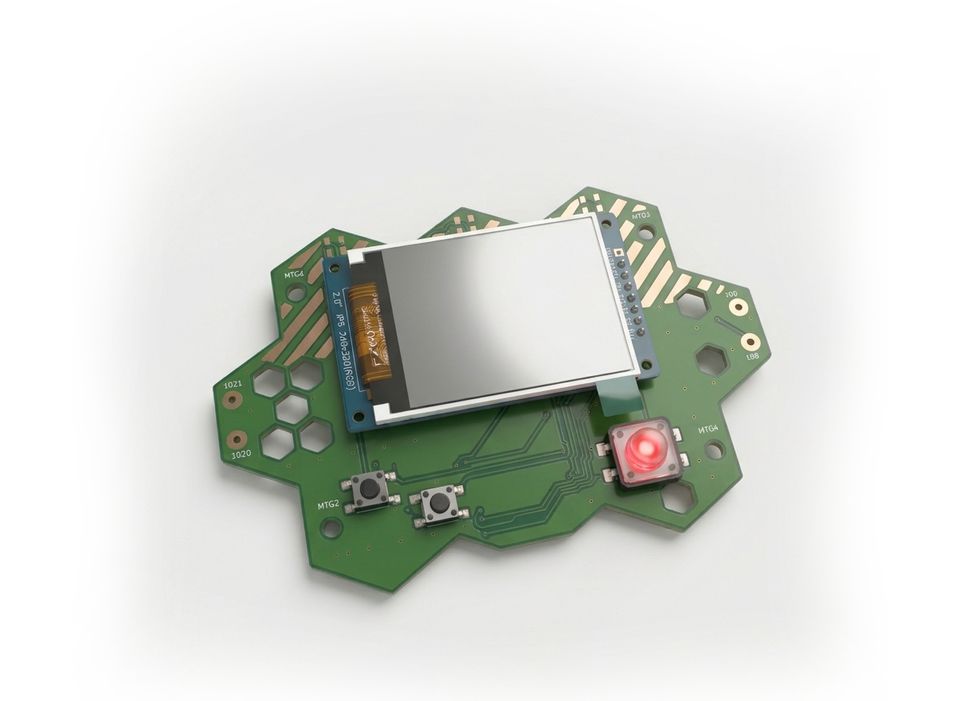
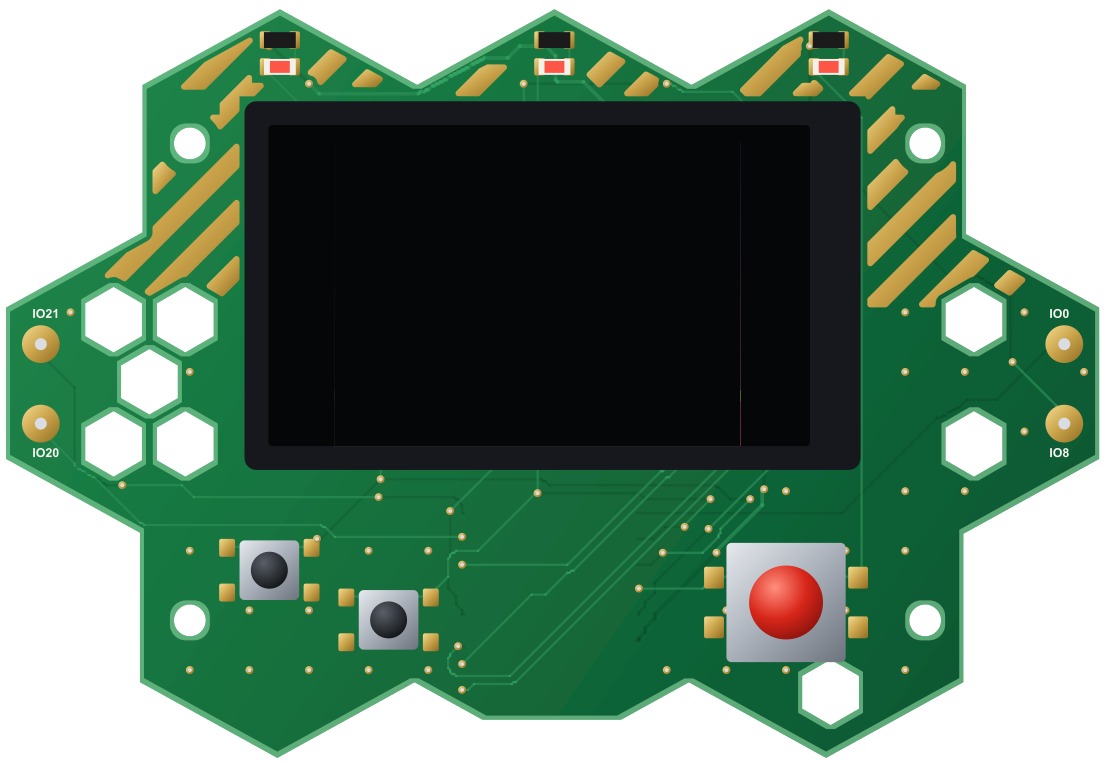
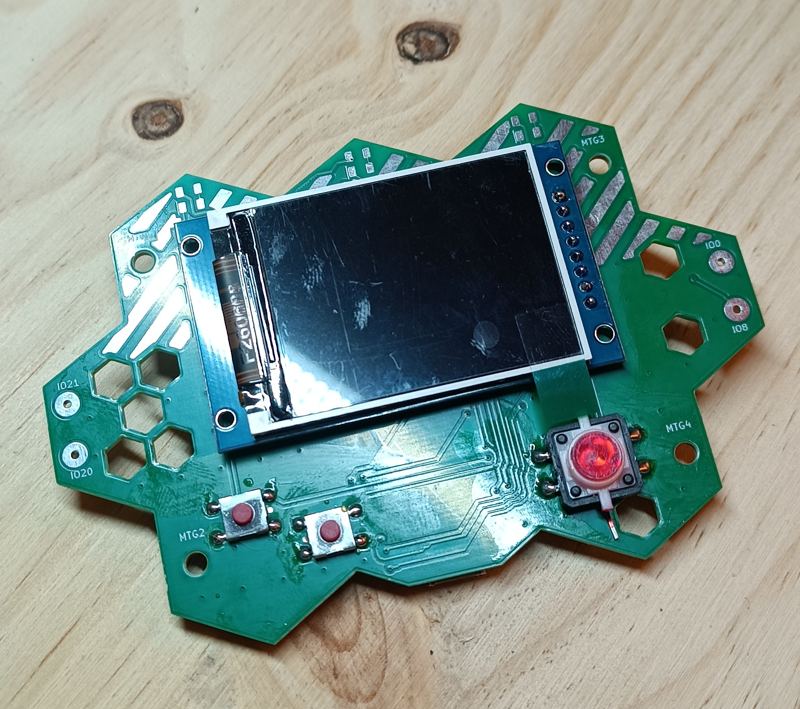
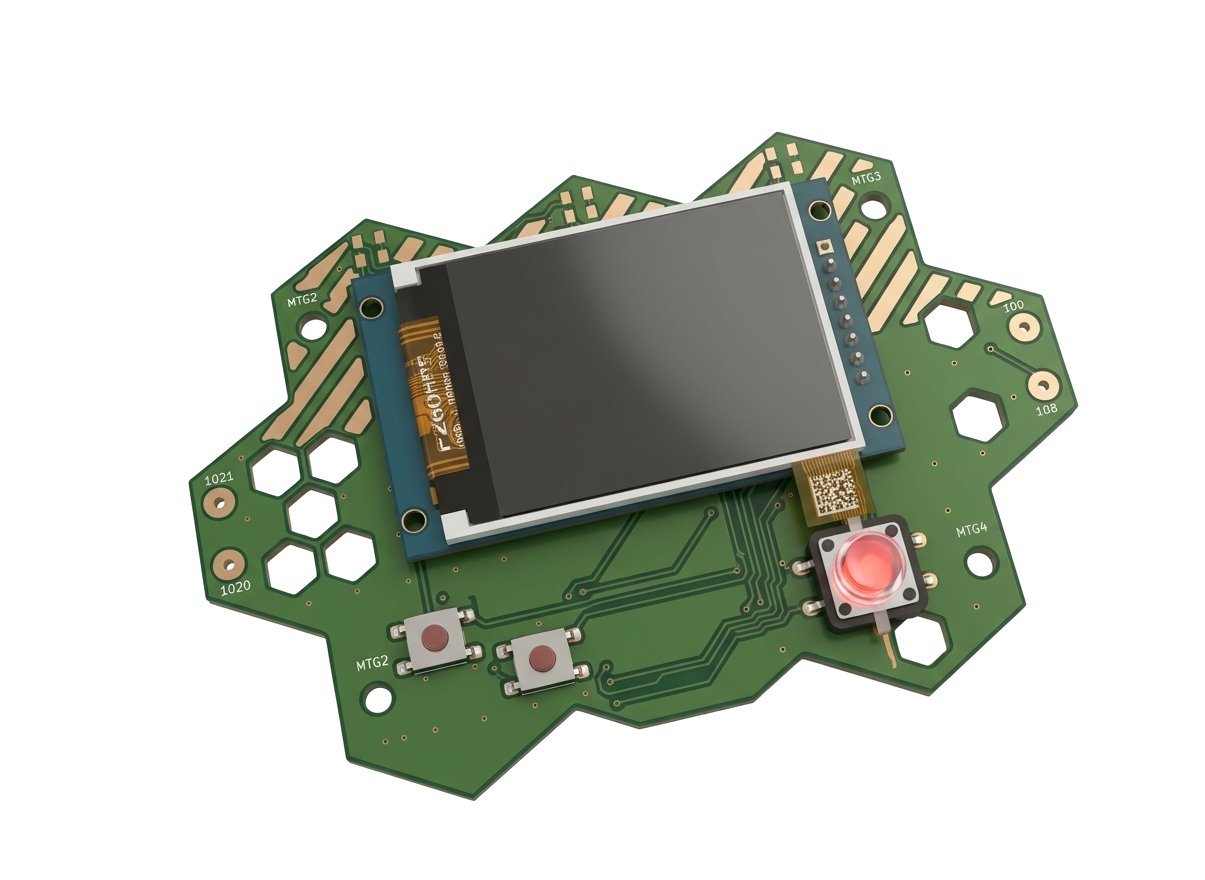
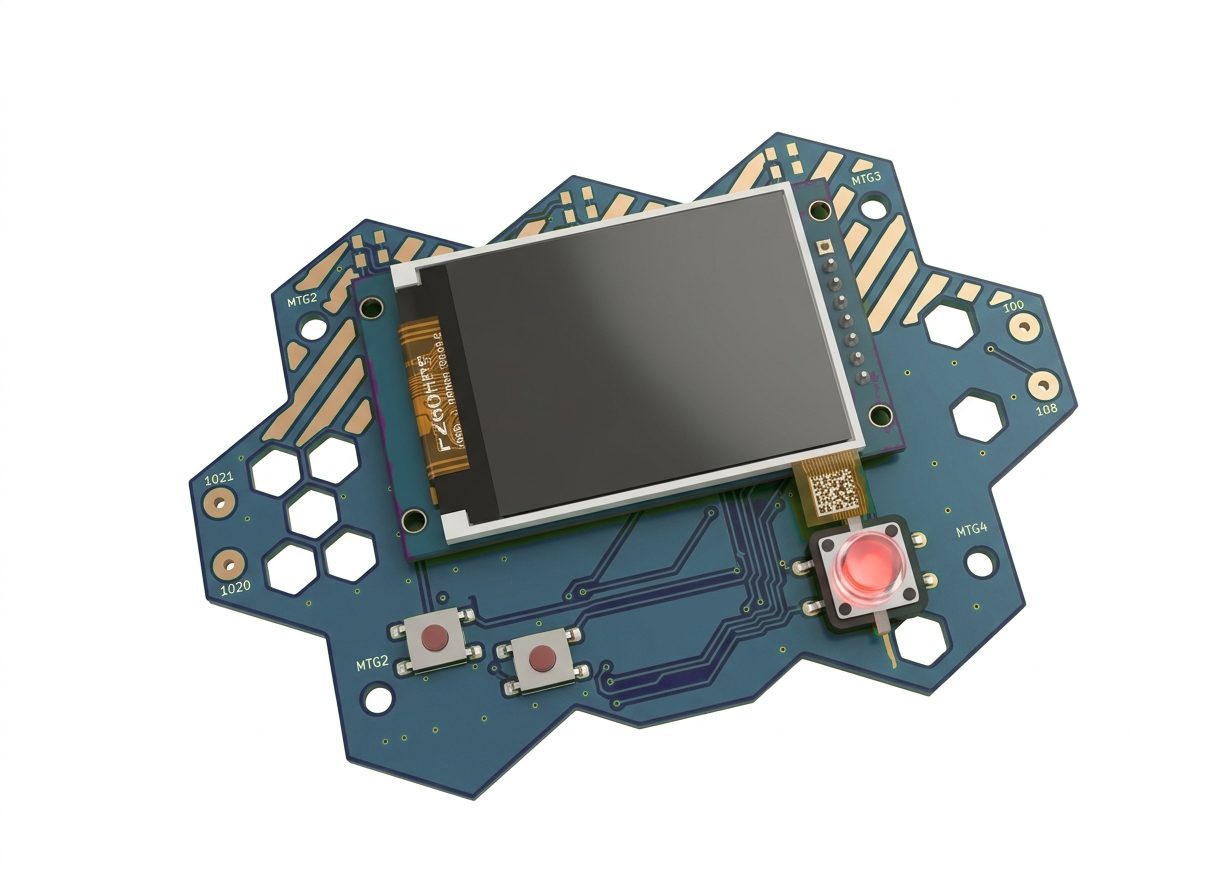
The Brique console: green hexagonal circuit board, colour screen and three buttons

The console that teaches you to use AI
in a safe and fun way.

29 € for the console kit

The story

It all began with the start of secondary school.

And the big question of the first smartphone.

It all started when my 11-year-old son began secondary school.

Like many of his classmates, he wanted his first smartphone. But after talking it over with him, I realised it was mostly to play games on the bus.

Being an electronics enthusiast, I set him a challenge: “What if we built our own games console?”

Read more

With the help of artificial intelligence, we could even imagine and create our own games. That is how Brique was born.

Very soon his 7-year-old little brother wanted one too. My two boys became my first testers. Every morning we developed the games further, following their ideas and wishes.

Then I tried a little experiment: putting general-knowledge questions and school lessons right into the games. To reach the next level you had to answer correctly. Otherwise, you started again!

And to my great surprise, they loved it!

They challenged each other, compared answers and learned without even noticing. The younger one kept trying to keep up with his big brother.

That is when I understood Brique could become much more than just a console.

Today Brique is growing around that idea: giving children the fun of playing while sparking their curiosity and their desire to learn.

An adventure born in a family, out of a wish to offer a different way to play.

Build your console

How does it work?

A screen, three buttons, an ESP32 brain: you assemble the hexagonal board yourself, with a soldering iron.

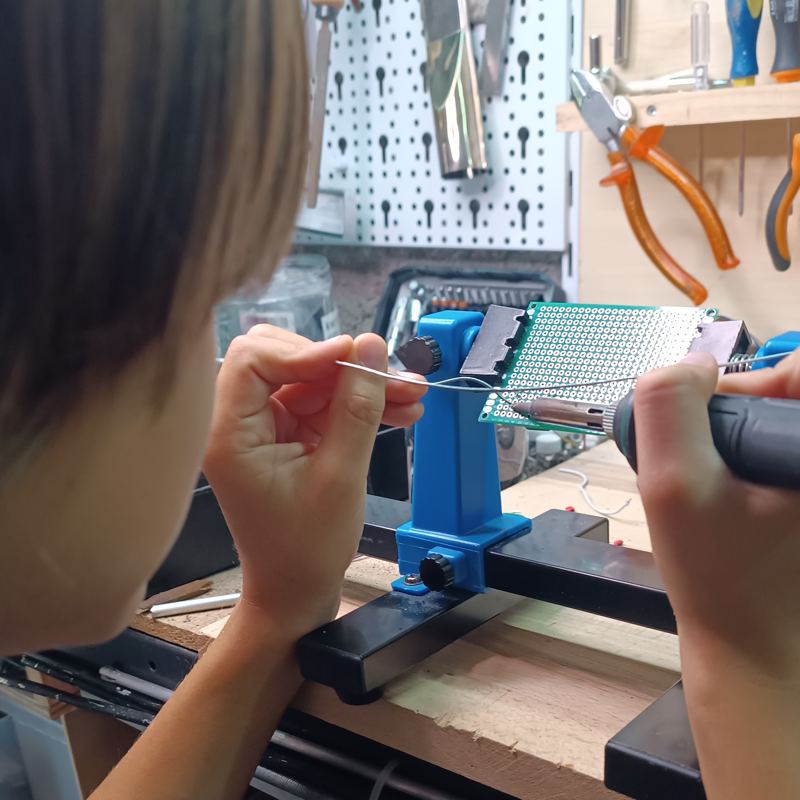
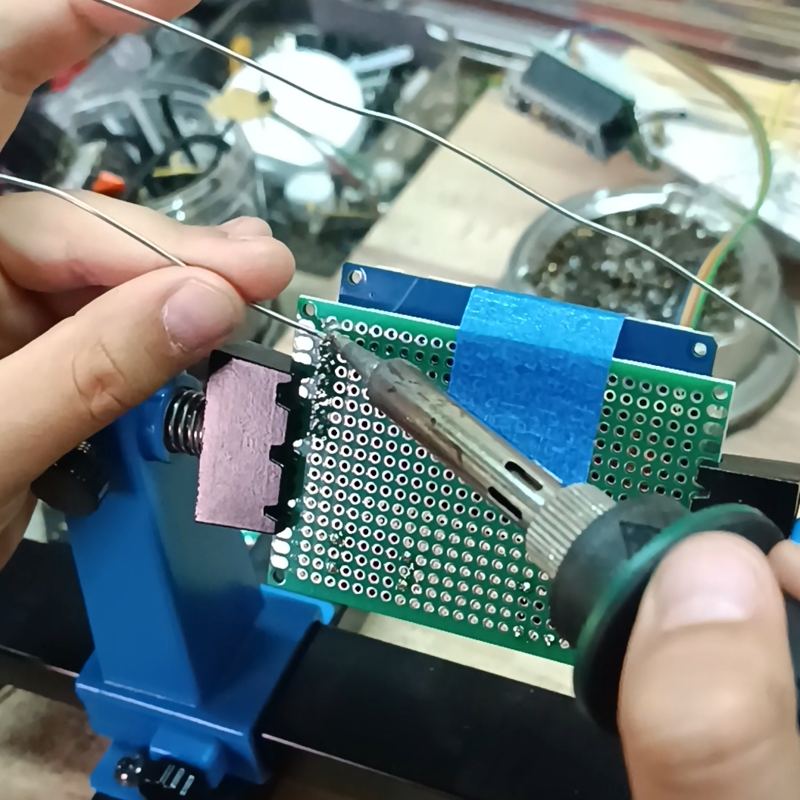
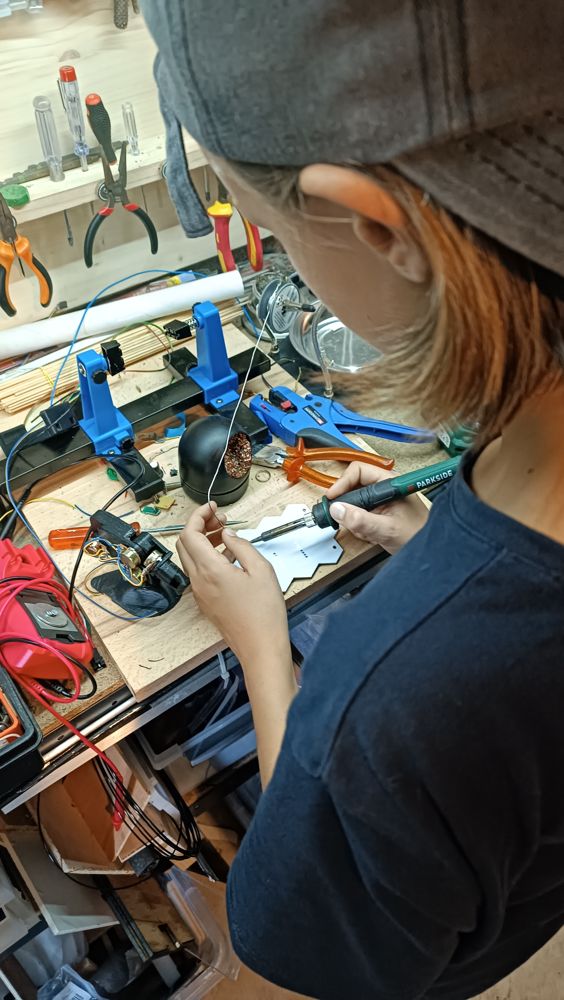
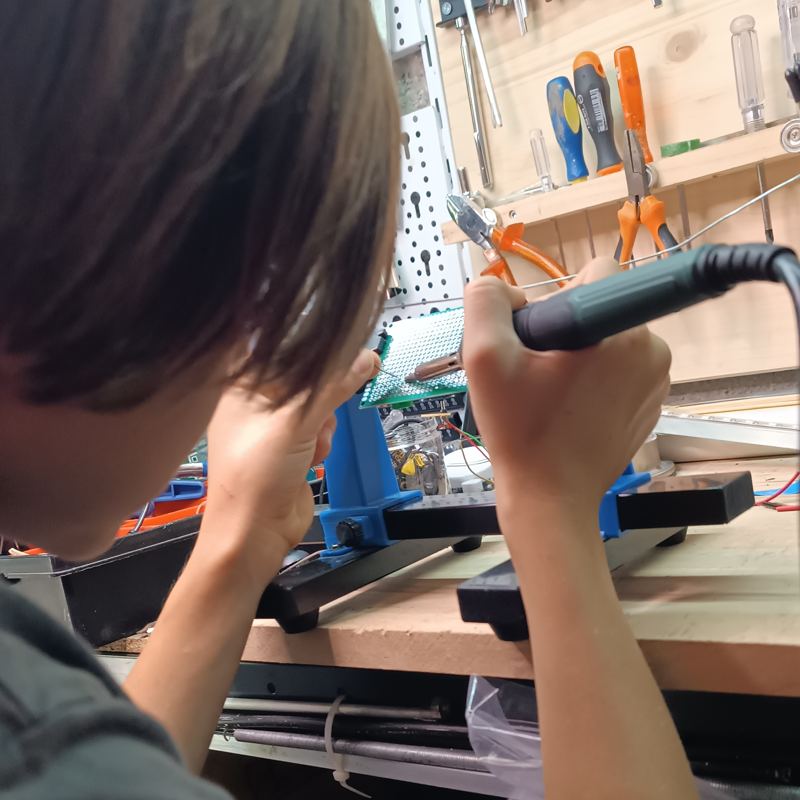
A child soldering, iron in one hand and solder in the other
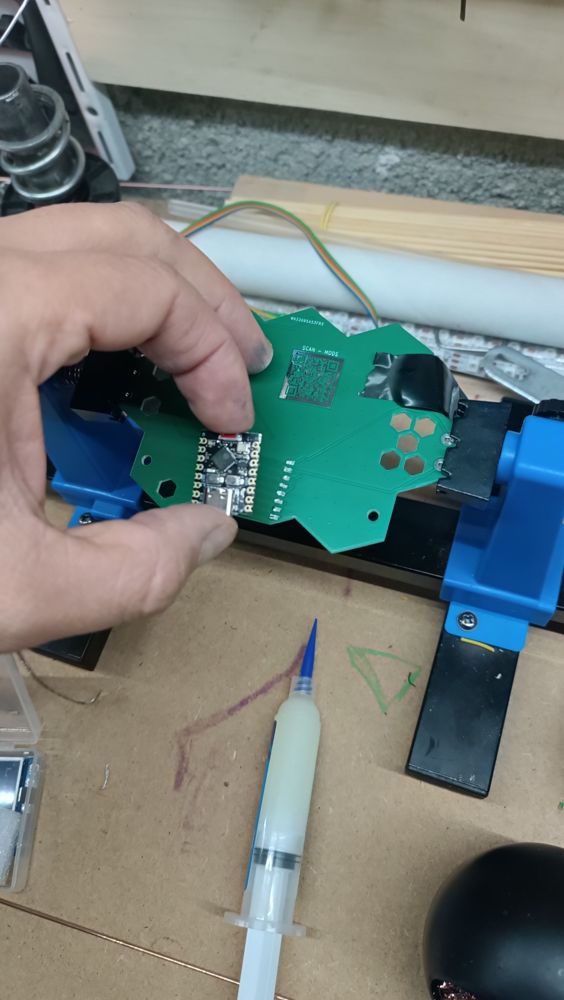
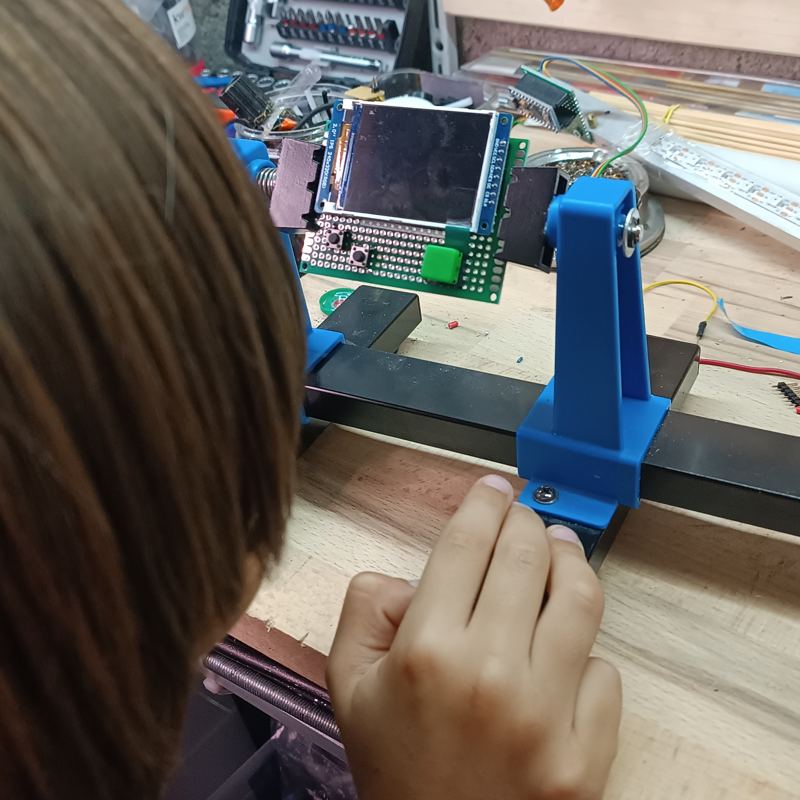
Iron in one hand, solder in the other, the board held in a stand
Close-up of a connector being soldered
Pin by pin, carefully, supervised by an adult
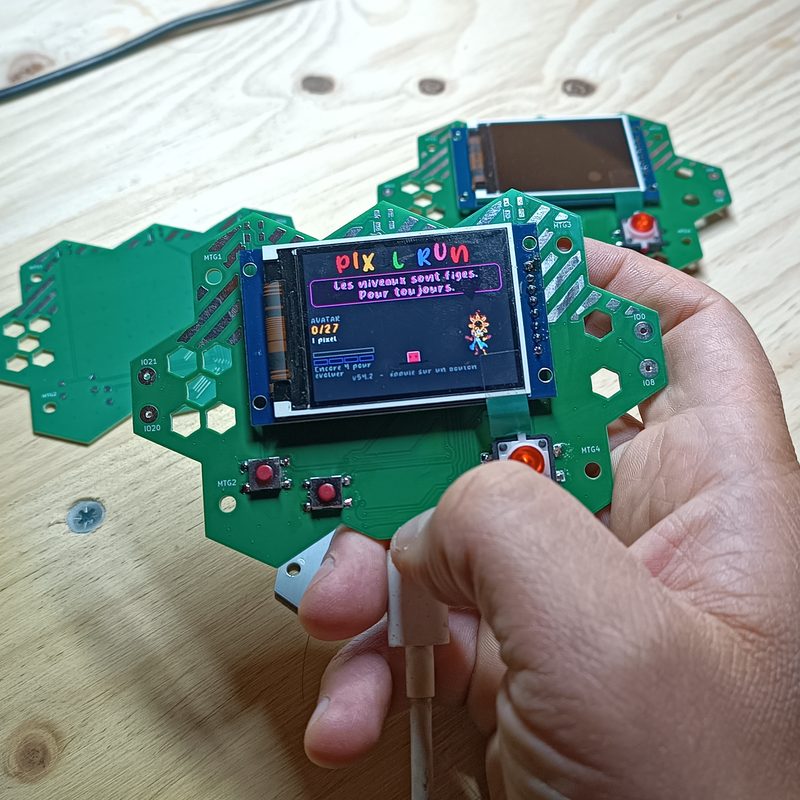
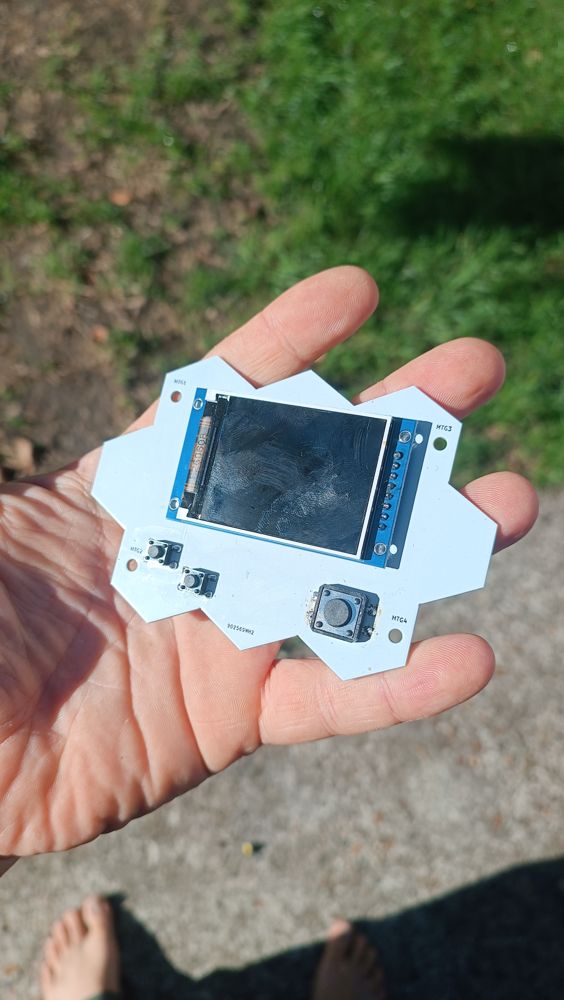
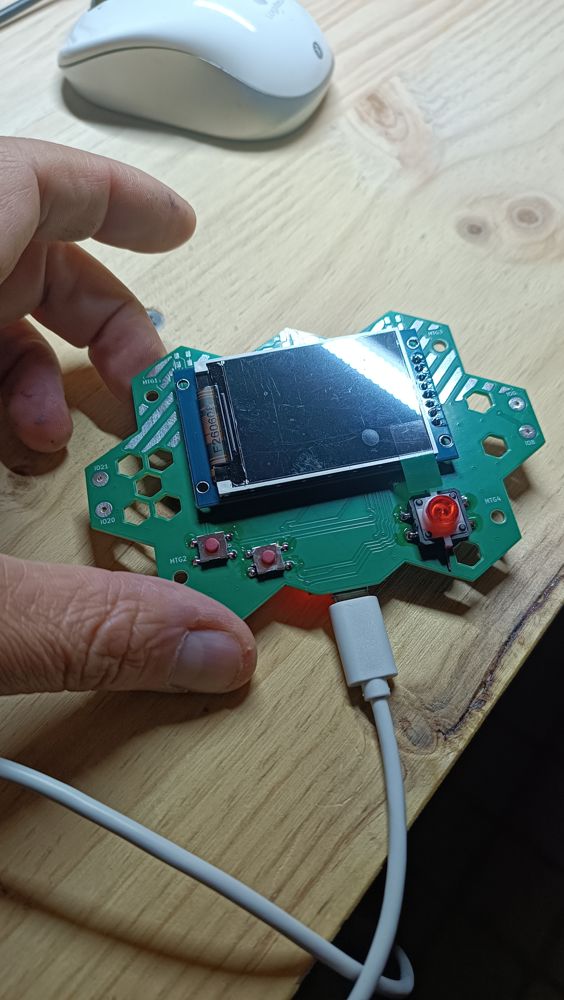
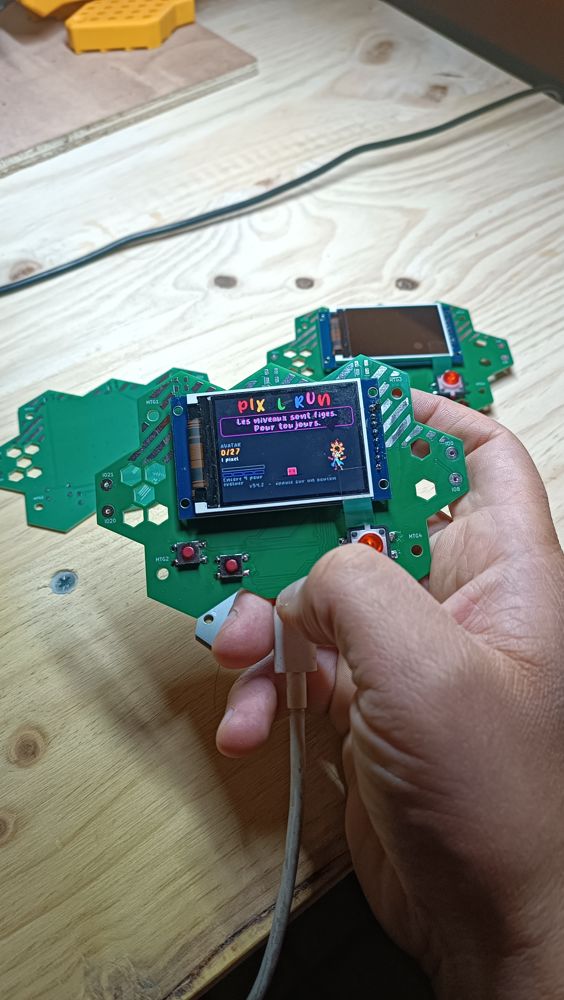
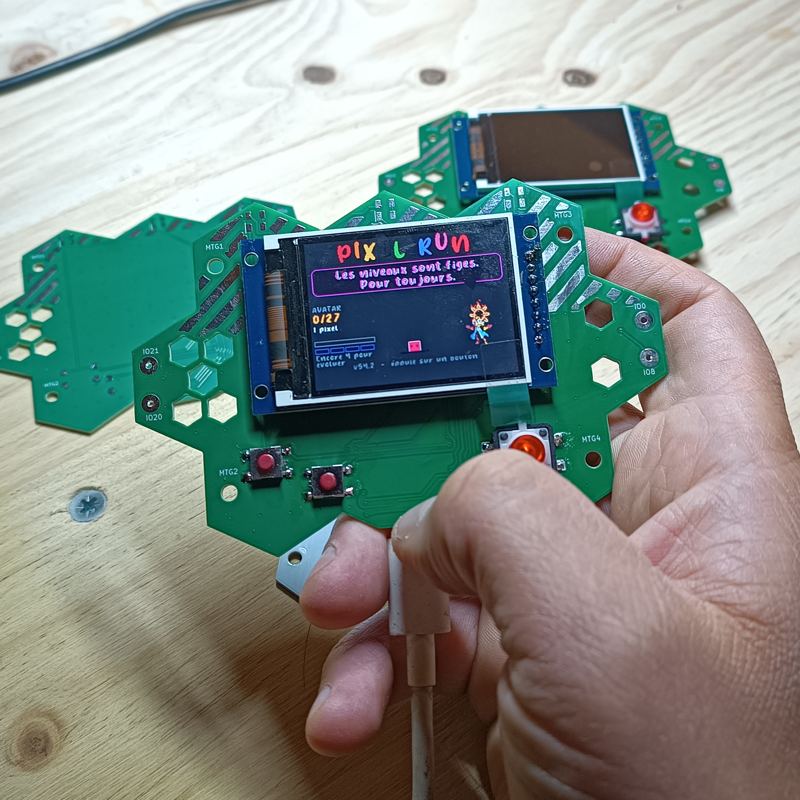
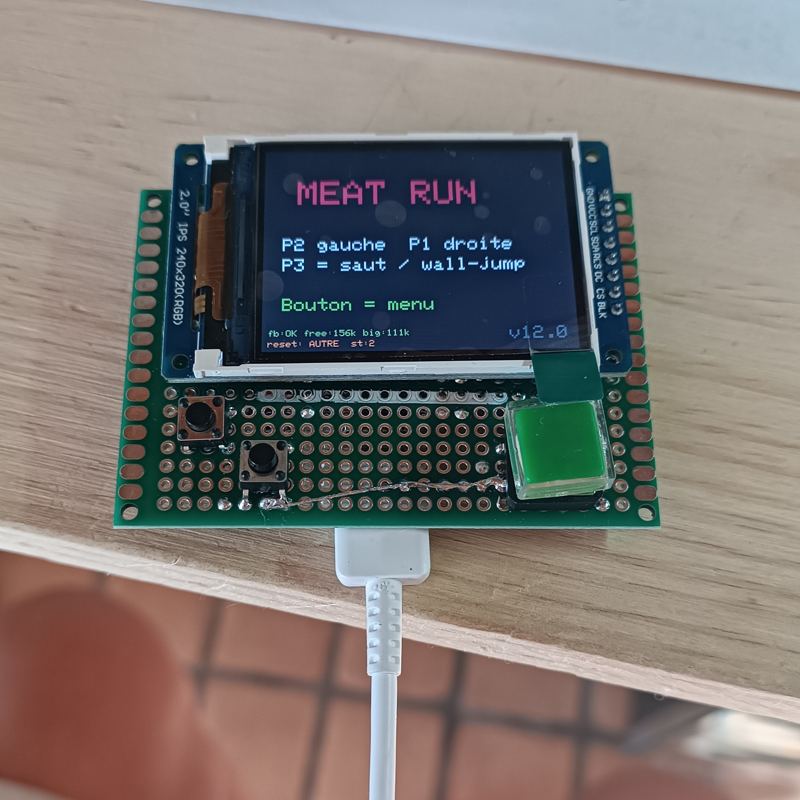
The console held in hand, lit up on the title screen of its first game
It lights up! The first game runs on the console you have just soldered

What’s inside

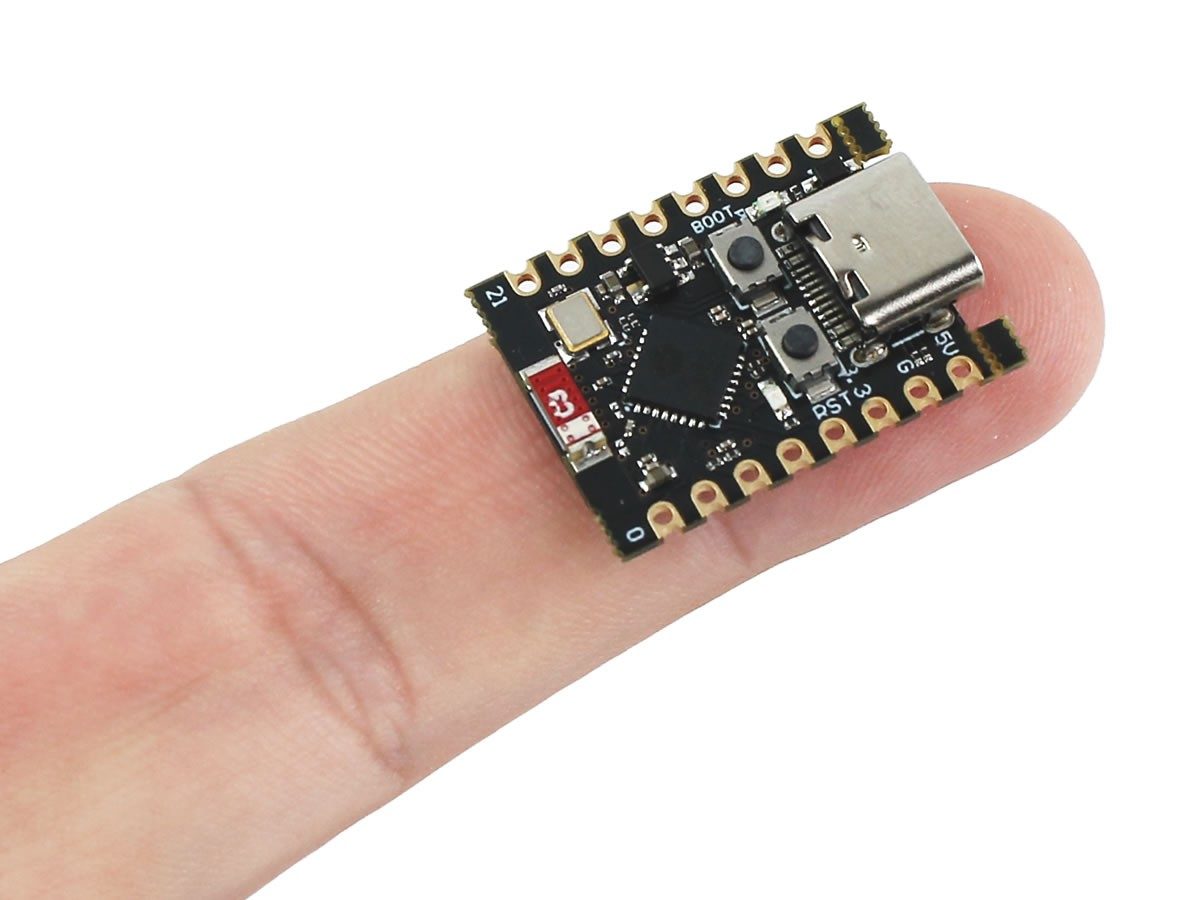
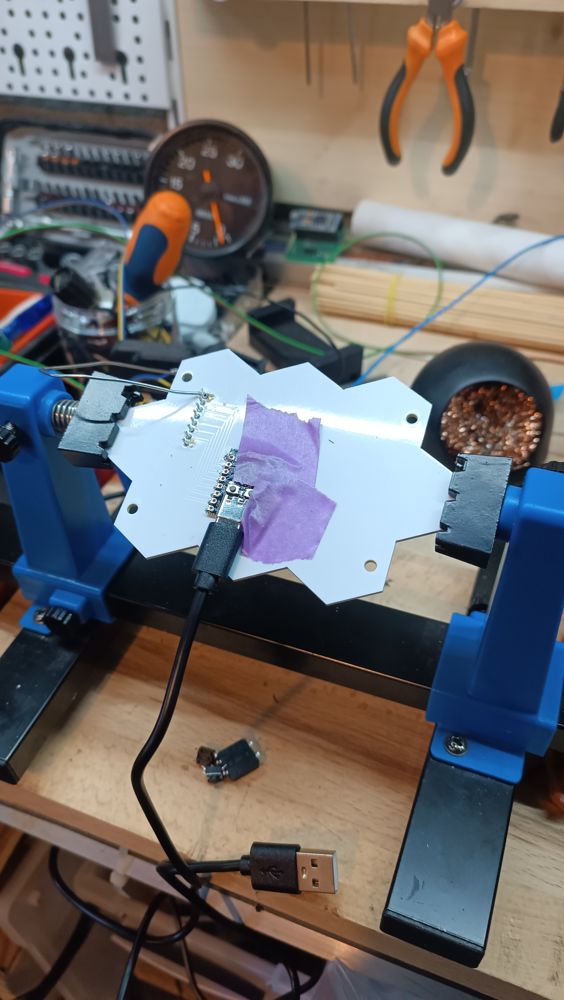
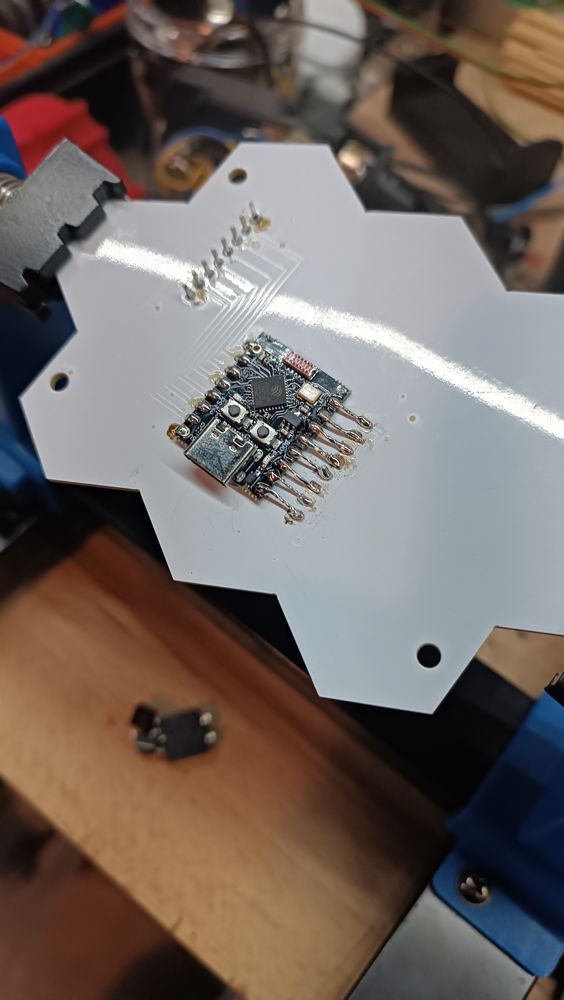
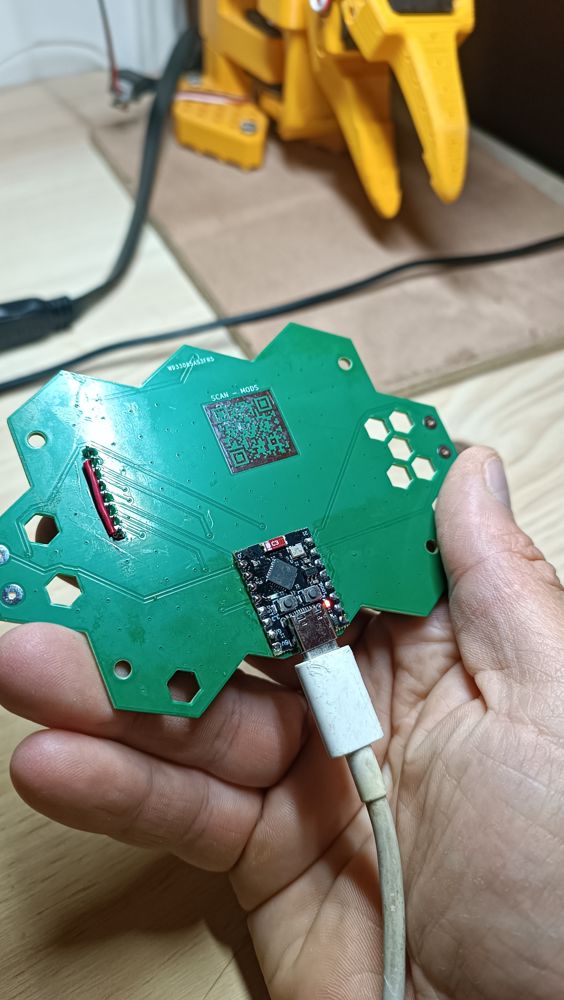
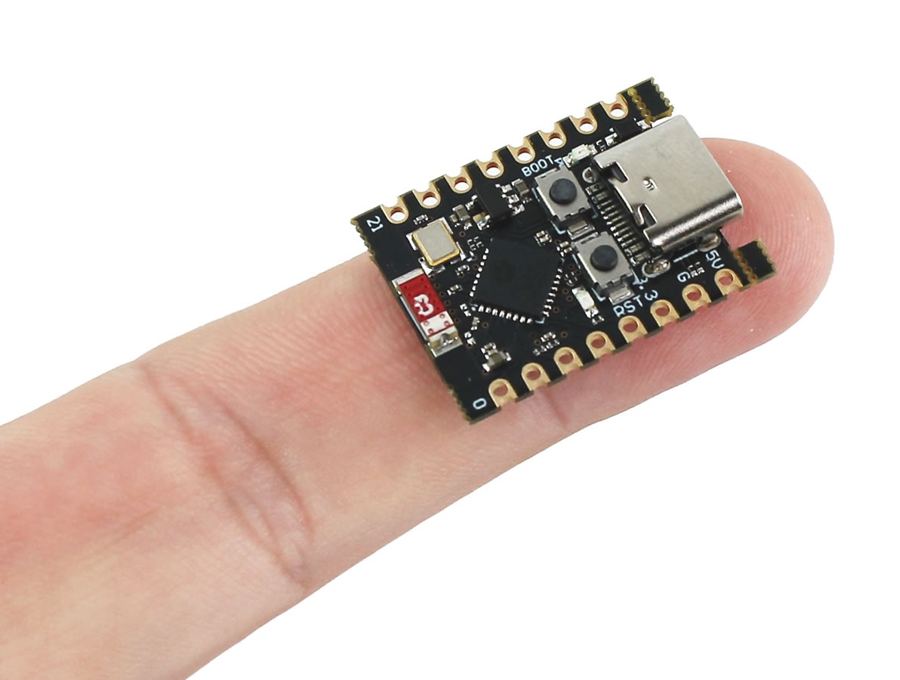
The console’s brain: an ESP32-C3 board the size of a finger, with a USB-C port
The brain: an ESP32-C3 the size of a finger, with Wi-Fi, Bluetooth and USB-C
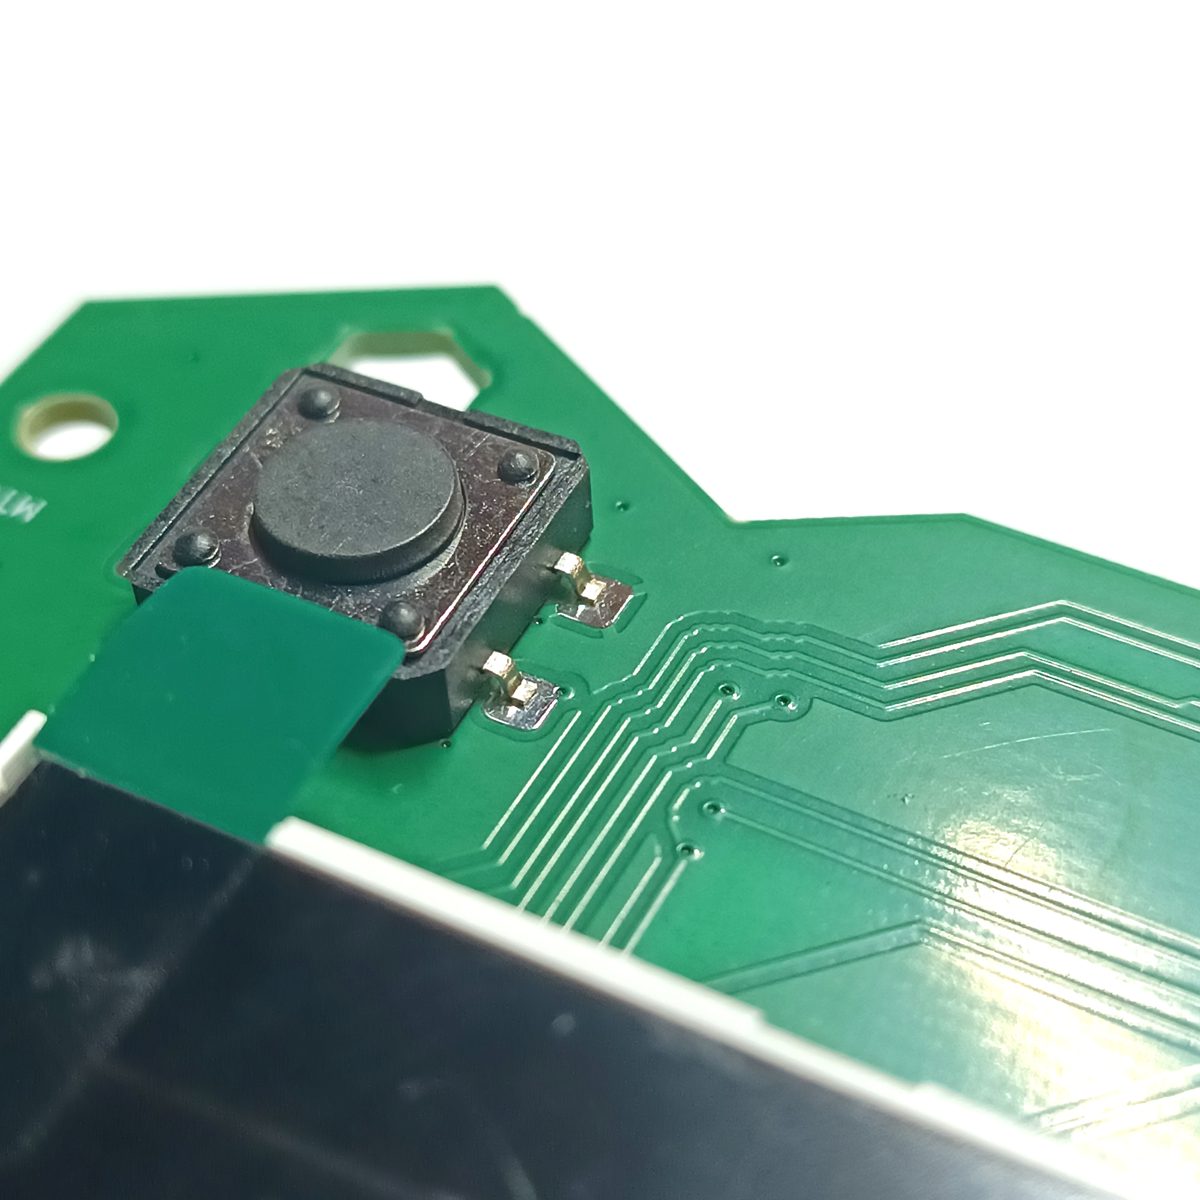
A button soldered onto the green board, next to the screen
The buttons: hand-soldered, right next to the colour screen
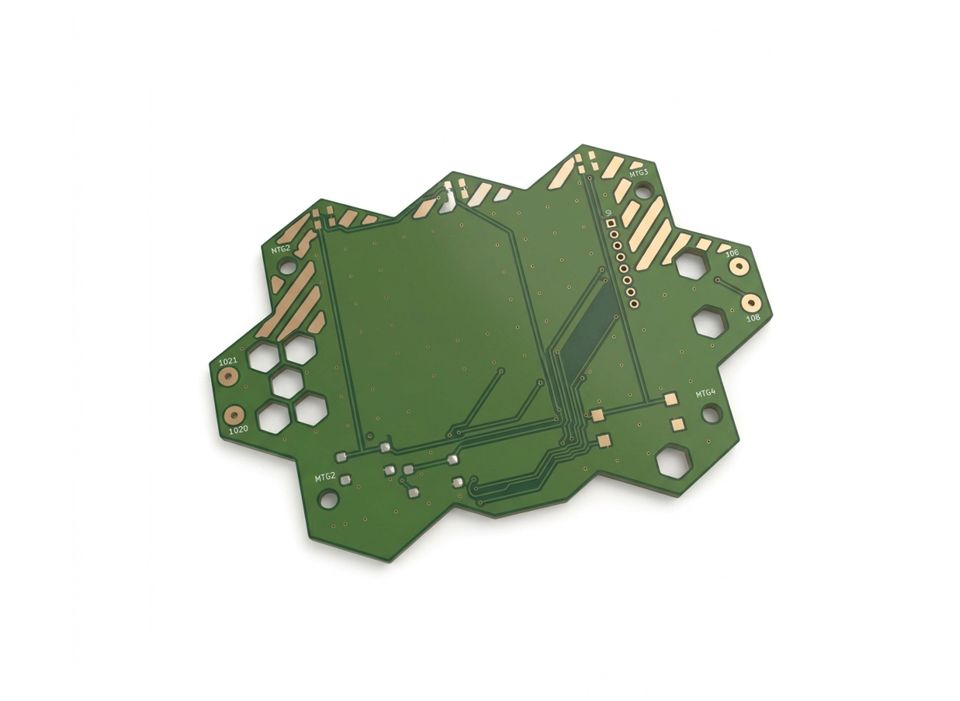
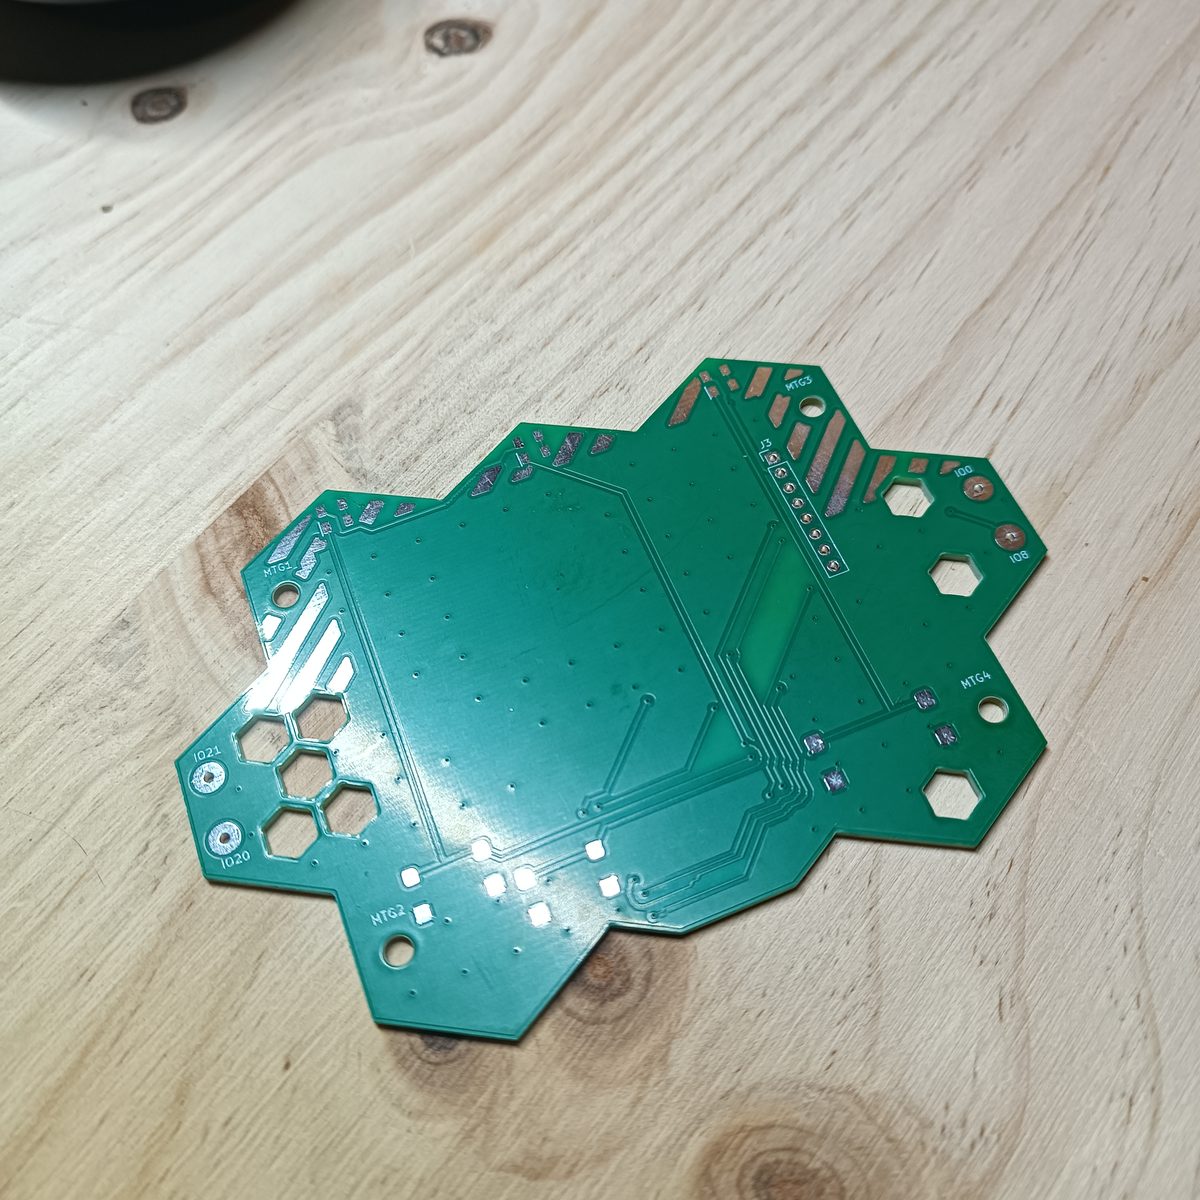
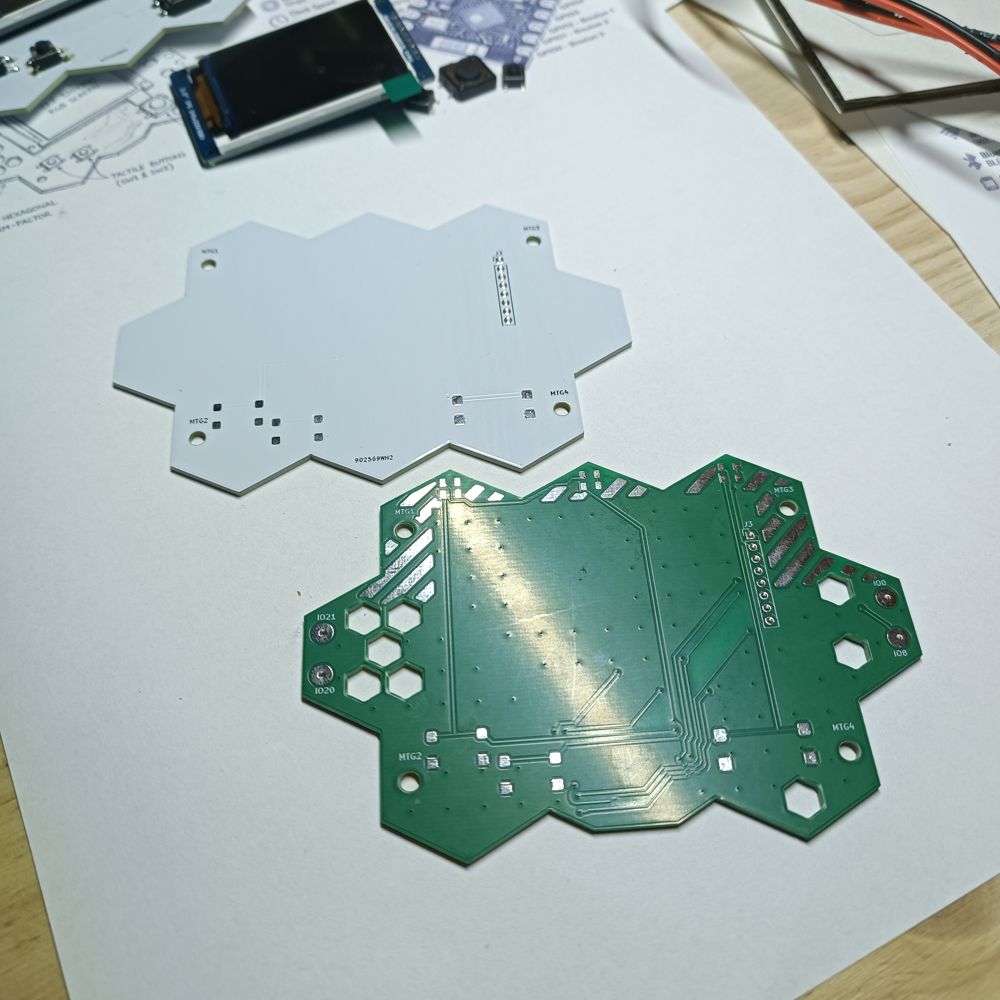
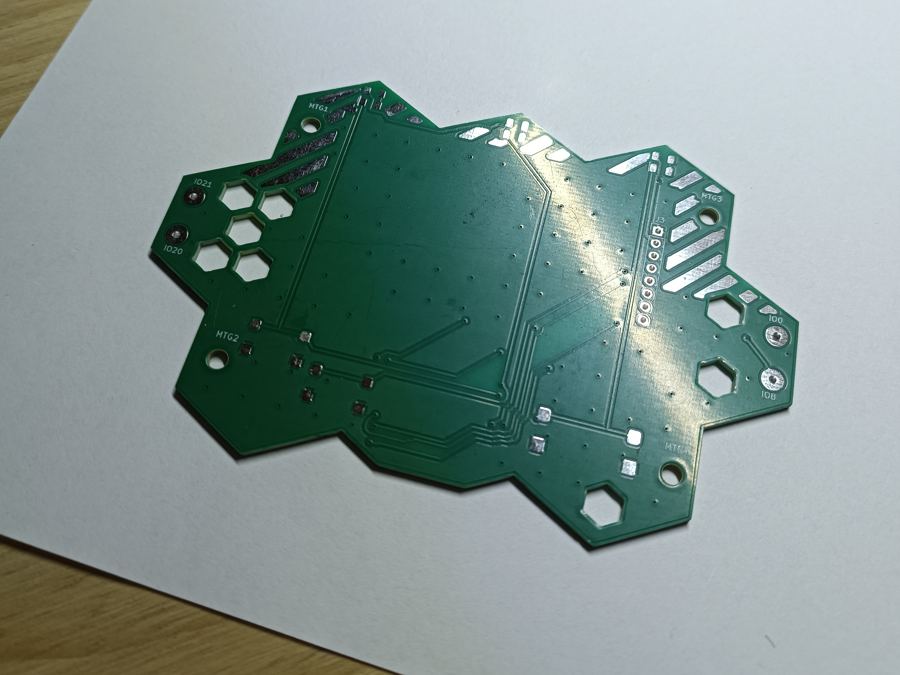
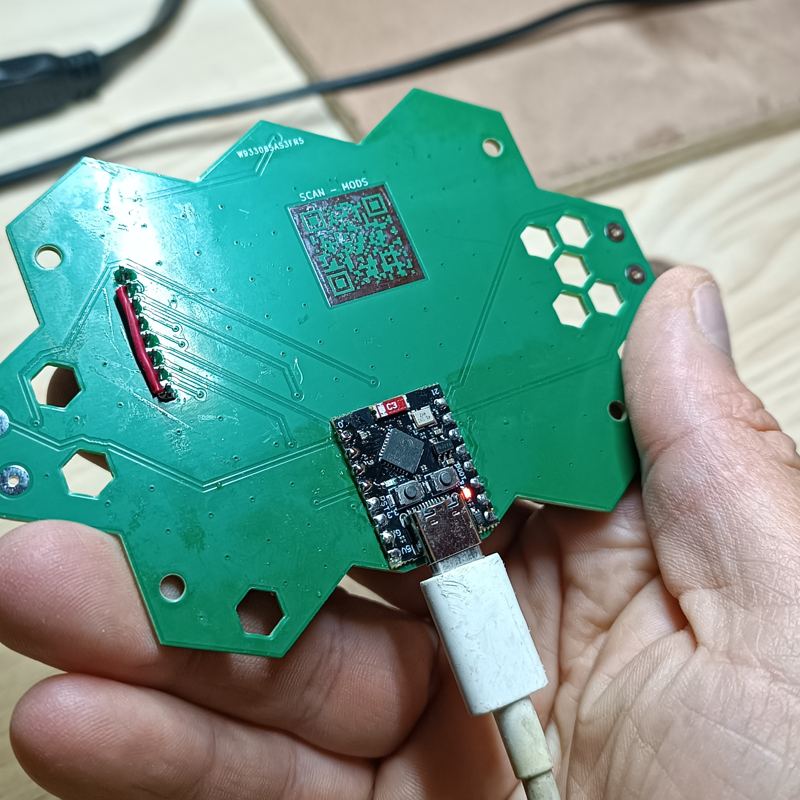
The bare green hexagonal board with its copper tracks
The board: hexagonal, its tracks link each button to the brain

Why 3 buttons and no D-pad? › Step-by-step assembly ›

Create your own games

You describe. The AI builds.
You play with your friends.

No need to know how to code: you describe your game, it lands on your console, and your friends play it with you.

Step 2 · AI

I describe, the AI builds

One sentence is enough. The AI sets up the level, I look, I correct, I start again: I’m the one who decides.

Step 3 · USB

I play and I share

The game goes into the console through the USB cable. A code shares it with friends, to play with up to 4.

Community

🏆 Community games

Every published game gets a code. You grab your friends’ games, beat their records and climb the leaderboard.

–games created
–players today
The shared game

🧱 One big game where everyone signs their own level

Everyone adds a level, signed with their nickname. Level after level, the shared game grows with all Brique players.

–levels in the shared game
Latest to have extended it–

A French AI that can only make games › The challenge: explore the console ›

About

Who makes Brique?

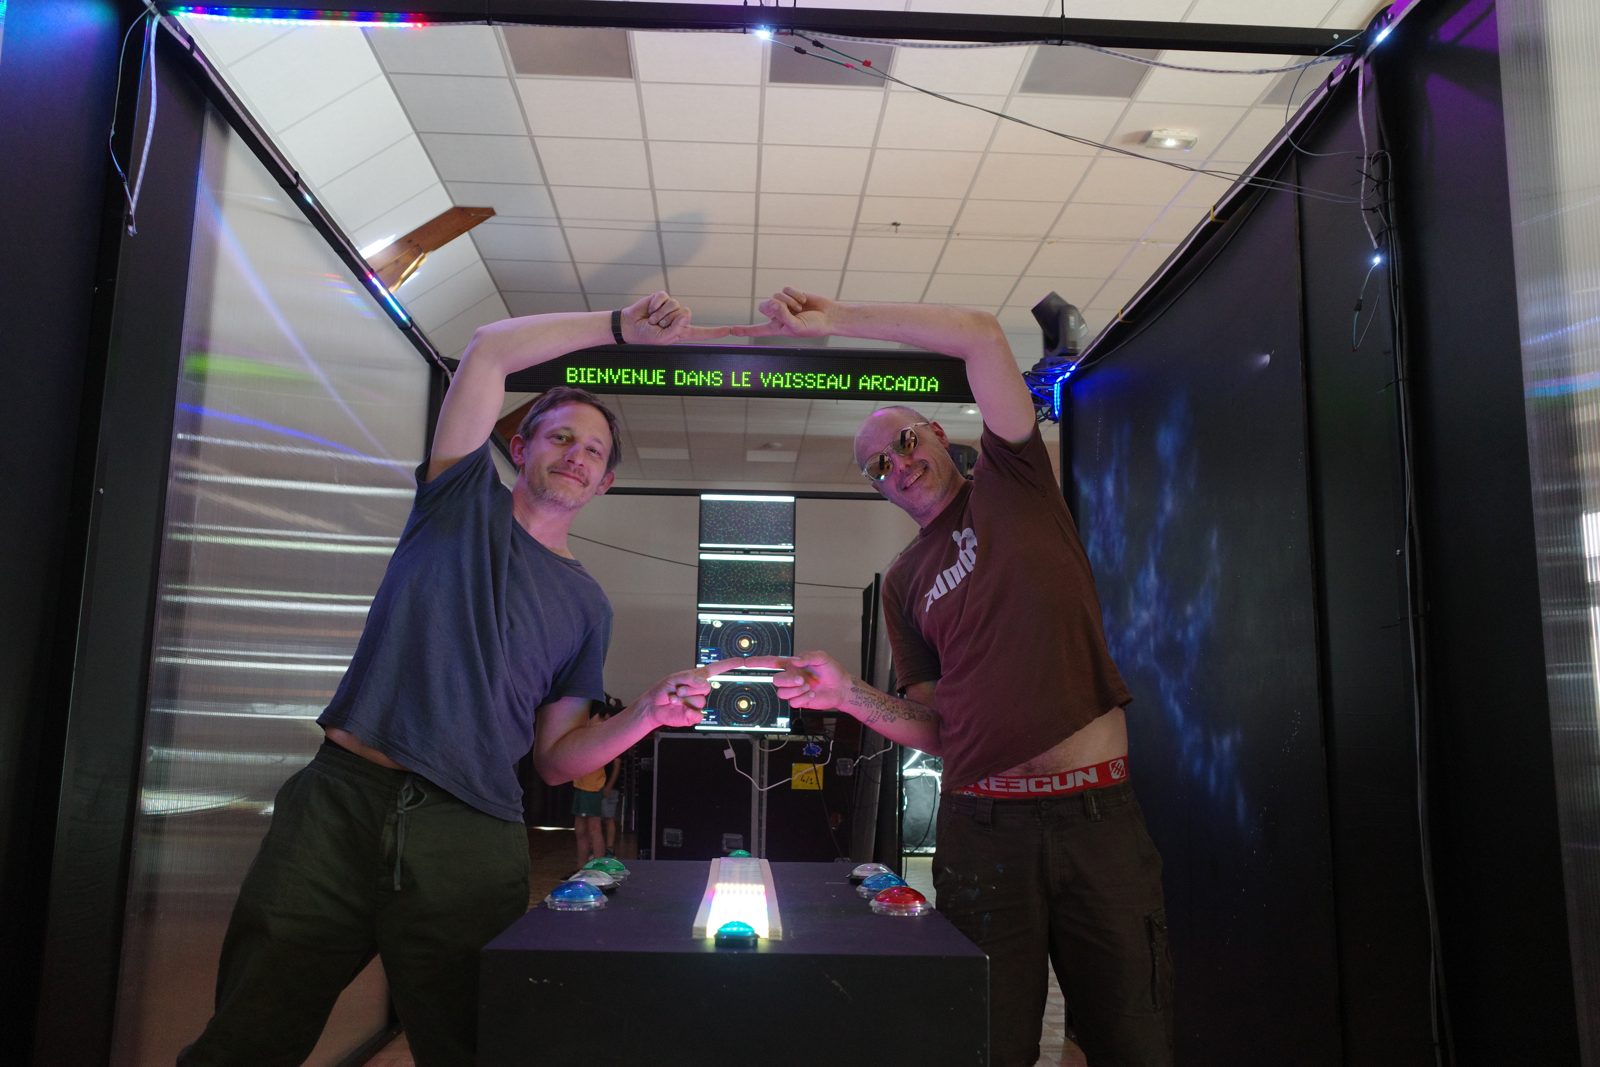
Jonathan and Anti, arms forming an arch, inside the Arcadia spaceship, one of their game installations
About us

Two makers from Le Cercle community space

Brique was born in community workshops, to make electronics, programming and digital tools accessible to everyone.

Jonathan Moriot
Designer and developer.

Anti
Visual artist, co-founder of Le Cercle, where he leads artistic and technical projects.

Le Cercle is a community space (a “tiers-lieu”) in Lunery, in the Cher department of France, 20 km south of Bourges, set in the former workers’ housing of the Rosières factory. Artists, craftspeople and creators share workshops, exhibitions and digital know-how there.

That is what Le Cercle is all about: a place open to everyone, to learn and create. Buying a Brique is not just buying one more product, it is helping this place grow.

Follow the adventure on Instagram: @brique_console

The prototypes

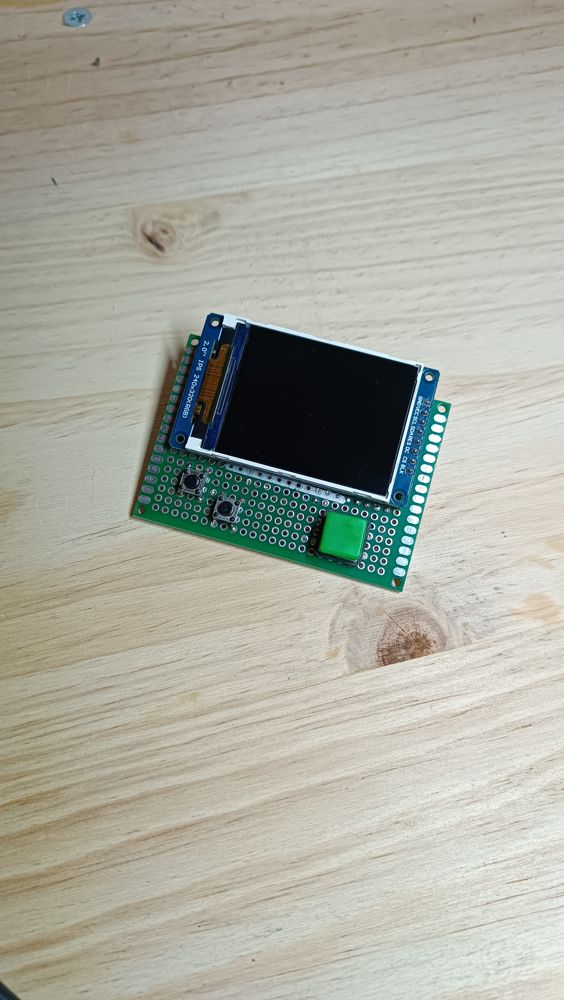
From perfboard to console

Three prototypes in six weeks: the first on 21 September 2026, the third finished on 31 October 2026.

Brique prototype 1, 21 Sept 2026
Proto 121 Sept 2026
Brique prototype 1, 6 Oct 2026
Proto 1B6 Oct 2026
Brique prototype 2, 14 Oct 2026
Proto 214 Oct 2026
Brique prototype 2, 14 Oct 2026
Proto 2B14 Oct 2026
Brique prototype 2, 14 Oct 2026
Proto 2C14 Oct 2026
Brique prototype 2, 15 Oct 2026
Proto 2D15 Oct 2026
Brique prototype 3, 26 Oct 2026
Proto 326 Oct 2026
Brique prototype 3, 26 Oct 2026
Proto 3B26 Oct 2026
Brique prototype 3, 27 Oct 2026
Proto 3C27 Oct 2026
Brique prototype 3, 27 Oct 2026
Proto 3D27 Oct 2026
Brique prototype 3, 29 Oct 2026
Proto 3E29 Oct 2026
Brique prototype 3, 31 Oct 2026
Proto 3F31 Oct 2026

Terms and conditions

Terms of sale and use

In force from 12 November 2026. By placing an order, you accept these terms.

1. Who is selling

Brique consoles are sold by the Fondation Brique, at Le Cercle community space, 2B rue de l’Église, 18400 Lunery (Cher), France. Contact: via Instagram @brique_console.

2. The product

Brique is an educational electronics kit, to solder and program, sold as a kit or pre-soldered. Like Arduino or Raspberry Pi boards, it is a tool for learning and experimenting: it is not a finished toy.

  • It contains small parts: not suitable for children under 3 (choking hazard).
  • Recommended age: 9 and over, under adult supervision.
  • The circuit board is bare: do not use it on a metal or damp surface, and do not get it wet.

3. Use under the responsibility of an adult

The console must be assembled and used under the supervision of a parent or responsible adult, in particular:

  • Soldering: the soldering iron heats to over 300 °C. Work on a stable stand, in a ventilated room, wear safety glasses, wash your hands after touching solder, and unplug the iron after use.
  • Power: only through the USB-C port, with a computer, phone charger or power bank that meets CE standards. Never connect anything else to the board’s pins.
  • Screens: some games include flashing. If there is a history of photosensitive epilepsy, seek medical advice before playing. Take regular breaks.
  • The AI and the site: creating games with AI happens online; an adult accompanies the child. No personal data about the child is requested (nickname and group code only).

4. Prices and payment

Prices are shown in euros, all taxes included, excluding delivery (Mondial Relay pickup point, 4.90 €). Payment is by card on Stripe’s secure page; the order is firm once payment is accepted.

5. Delivery

Delivery only to Mondial Relay pickup points, in France. Check the parcel when you collect it; if a part is missing or damaged, let us know within 7 days with a photo.

6. Right of withdrawal

You have 14 days after collecting the parcel to change your mind, without having to give a reason. The kit is returned complete, at your expense, and refunded within 14 days of receipt. A soldered, assembled or modified kit has lost value: the refund may be reduced accordingly.

7. Guarantees

You benefit from the legal guarantee of conformity (2 years, articles L217-3 and following of the French Consumer Code) and the guarantee against hidden defects (articles 1641 and following of the French Civil Code). These guarantees cover the components delivered; they do not cover damage caused by assembly (failed soldering, overheating, a component fitted the wrong way round), an unsuitable power supply, water or a modification of the board.

8. Software and games

The site, the console firmware and the games are provided as is, with no guarantee of uninterrupted operation. Games written by the AI or shared by the community may contain errors: they cannot damage the console, which can be reset by an update from the site. Content published in the Community remains the responsibility of its authors; we may remove anything unsuitable for children.

9. Liability

The Fondation Brique cannot be held liable for damage, injury or loss linked to assembling or using the console in ways that do not comply with these terms and the safety instructions above, in particular without adult supervision, nor for indirect damage (loss of data, equipment connected to the console). This limit does not apply to bodily injury caused by a product defect, nor to anything the law forbids excluding.

10. Your data

We keep as little as possible: see Your data.

11. Disputes

These terms are governed by French law. If you disagree with something, write to us first: we almost always find a solution. Failing that, you can use a consumer mediator free of charge, then the competent courts.
Our choices

Choices made on purpose.

Our choice · French AI: Mistral AI

An AI that can only make games

Brique does not use an assistant that chats about everything. The AI, from Mistral AI, a French company, has been confined to a single job: turning the child’s sentence into game settings. Less freedom for it, fewer mishaps for the youngest.

  • 🎮 It doesn’t chatNo conversation, no web search, no images: a sentence goes in, game settings come out.
  • 🧱 Everything is filteredOur server only keeps the settings the console knows. The rest is thrown away before it reaches the screen.
  • 🛡 Trick instructions are ignoredAn off-topic request does not make it step out of its role. Mistral’s safety guardrail is switched on, and a swear-word filter runs behind it.
  • 👤 No personal dataIt only receives the sentence and the game settings: never a name, an address or an email.
  • 🔑 For registered users onlyThe child creates an account with a nickname and a password, and can join an adult’s group (workshop leader, teacher or parent). Without an account: a few tries per day to discover it. Each console comes with a 3-month AI allowance, shown as a gauge.
  • ⏱ A limited number of requestsA few dozen per day per child: enough to create, not enough to spend the whole day in front of the screen.
What we keep about children and adults ›
Our choice

Why 3 buttons and no D-pad?

Left, action, right. We sorted 30 game genres by the controls they need: with 3 buttons almost everything stays playable; sometimes you just have to invent the way to play.

3 buttonsD-pad + 1 button
✅ Playable as is16 / 3027 / 30
🟡 Playable with adapted controls11 / 302 / 30
❌ Not playable3 / 301 / 30
Playable in total90 %97 %

As is: platformer, racing, runner, bird between pipes, brick breaker, Pong, shooter, rhythm, Simon, stacker, quiz, choose-your-story, golf, fishing.

With adaptation: Snake and maze (you turn left or right), Pac-Man, Tetris (the piece falls on its own), Sokoban, 2048, noughts and crosses (a cursor goes round the grid), RPG menus.

What 3 buttons do better: two-player duels on a single console, one button each, and games you play without looking at your hands.

Constraints make you invent. “How do I make Pac-Man with 3 buttons?” is a real game-designer question: the child finds the answer, not the controller. A D-pad leads back to games that already exist; 3 buttons push towards games that don’t exist yet. It is also what makes the console recognisable: the 3-button console.

Ranking done by us across 30 common genres: a game-design estimate, not a study.

The challenge

🎯 Explore your console

Let’s be honest: a 3 € ESP32-C3 is no match for a Switch. Or even a PS Vita. Or even your sister’s calculator. 🤏

Every shared game reveals one of the console’s secret possibilities. Can you reach its limits all the same?

– of the console already explored by the community

Community · games, plays, leaderboard

Here you create,
you share, you discover.

–games created
–games finished
–players today
Active players

🏆 Game leaderboard

🆕 New levels

🔥 Popular this week

🧱 The shared game

One big platform game, already in your console: you climb to the flag, then the next level, all the way to the last. Everyone adds a level signed with their nickname: take a level, change it your way and add it to the end. Someone from Brique checks it before it joins the game.

🧩 Brique games

Complete games written by the Brique team. Take one: it lands in Create, where you can send it to your console or change it your way.

🎯 The challenge: explore the whole console

Let’s be honest: a 3 € ESP32-C3 is no match for a Switch. Or even a PS Vita. Or even your sister’s calculator. 🤏 Can you reach its limits all the same?

Every shared game that uses a new mechanic reveals a square. The others stay secret: it’s up to you to find them!

0 %

🧮 No console? Test your ideas

Write games, one per line (e.g. a snake that eats apples). The percentage of possibilities covered is worked out live.

0 %

💡 Players’ ideas

What you want in the game that the console can’t do yet. The most requested will arrive in future updates!

A simple kit for two,
or a ready-made teaching aid.

In the kit

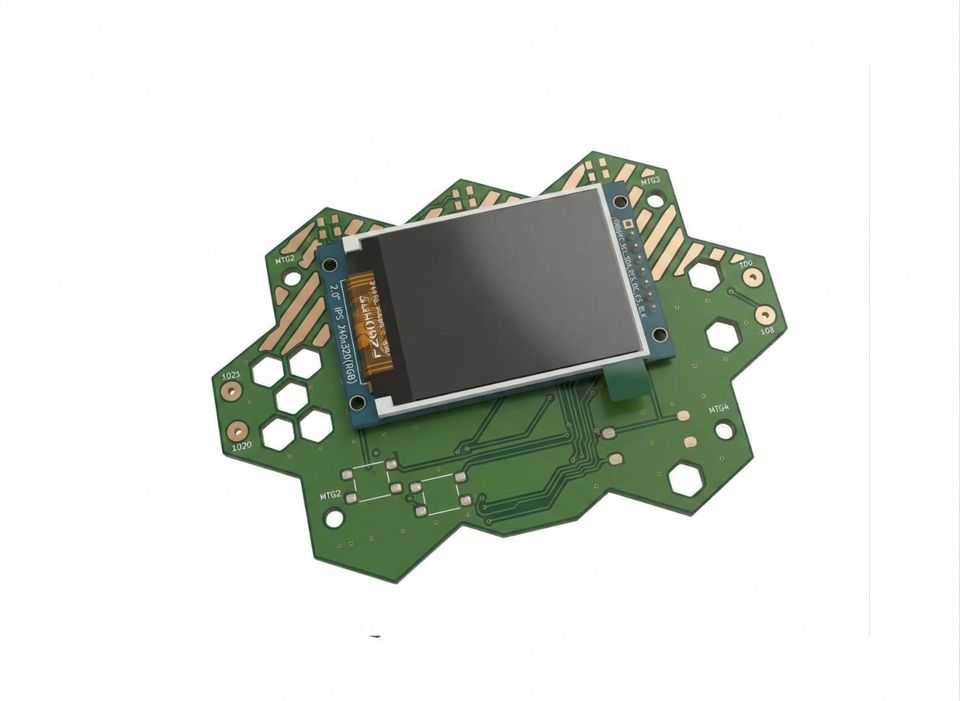
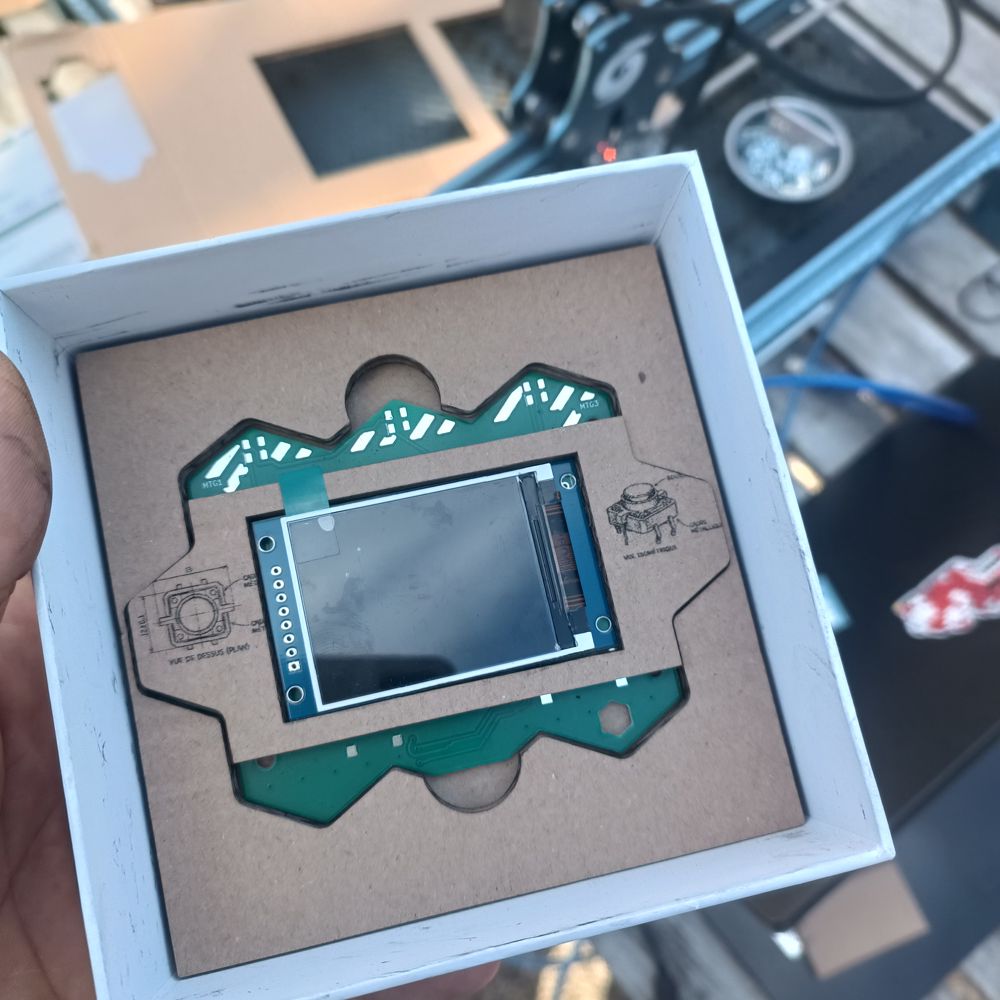
The hexagonal circuit board, still bare
PCB1The hexagonal board
The ESP32-C3 Super Mini module, barely bigger than a fingertip
U1The brain: ESP32-C3
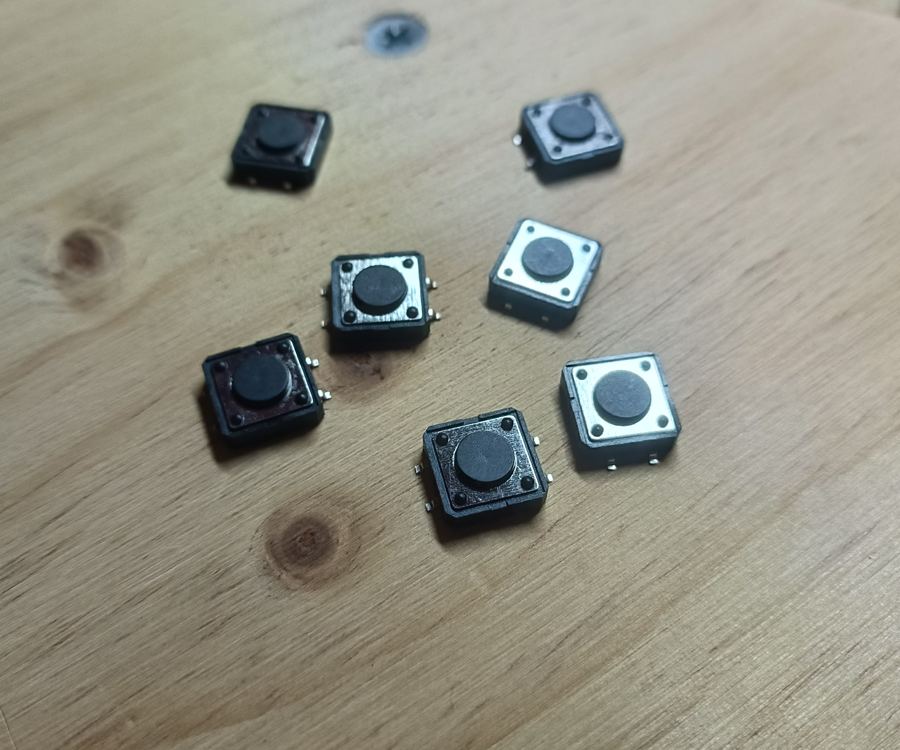
Loose push buttons on a table
SW1-SW3The 3 buttons
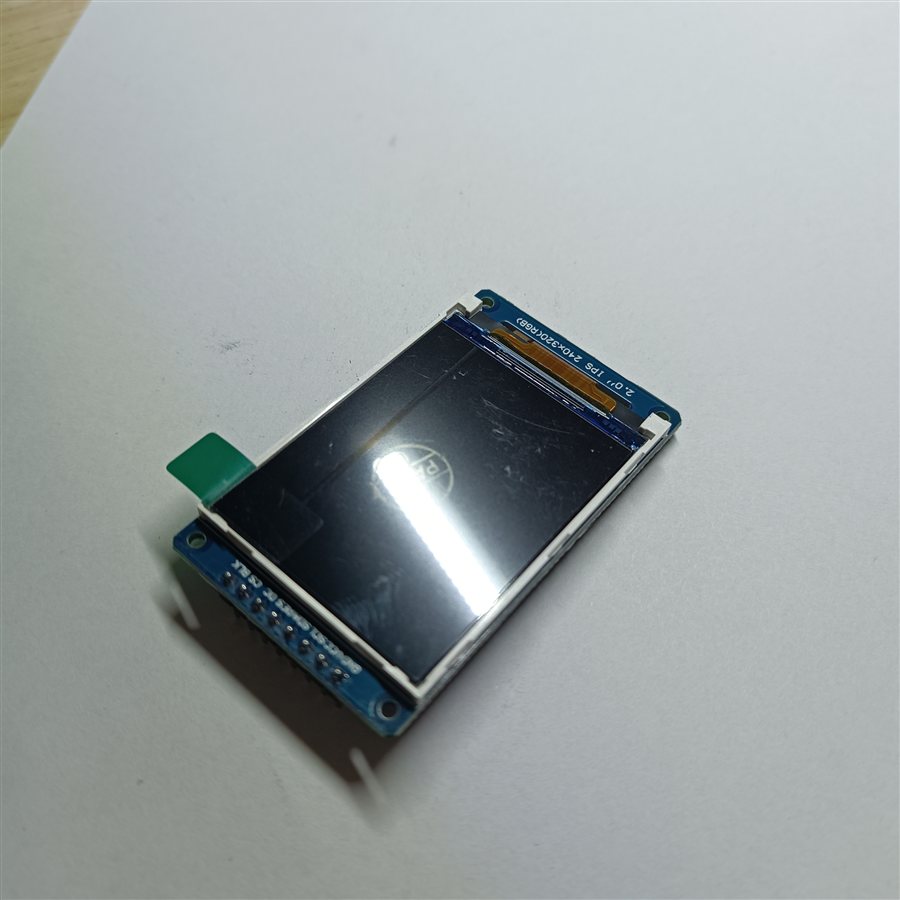
The console’s colour screen
J1The screen

Everything is hand-soldered on large pads: designed for a first soldering job, from age 9 with an adult.

Solder it yourself, or ready to play.

Spare parts.
A part broken or lost, or fancy building another one? They are also sold individually.

The ESP32-C3 Super Mini module
ESP32-C3 module
The console’s colour screen
Colour screen
Push buttons
Push button

Already have your own Brique?

Console built or bought elsewhere: just get access to the interface (create, test and send your games), with no hardware or delivery.

More than a console.

Buying a Brique is not buying one more object. It is helping Le Cercle grow, a community space open to all in the Cher, in central France, where people come to learn, make and create together: soldering, programming, inventing.

Every console sold supports this place, its workshops and the next ideas that will come out of it.

Why we don’t ask for your address.
Because the best-protected data is the data we don’t have. If our server were hacked tomorrow, nothing useful about you would be found on it.
What we keep

  • An encrypted fingerprint of your email (HMAC), impossible to read back: it is only used to recognise your account.
  • Your orders: number of consoles, amount, status.
  • The number and address of the pickup point you chose: a shop, not your home.

What we never keep

  • Your postal address: we don’t ask for it.
  • Your email in clear text: it is used to send the sign-in link, then forgotten.
  • Your name, your phone number, your bank card: entered at Stripe, never with us.
  • No password, no advertising cookies, no trackers.

Who holds what

For how long

Your rights

The “delete my account” button erases your account immediately; your past orders become anonymous. For any question (GDPR: access, rectification, erasure), write to us; you can also contact the CNIL, the French data protection authority. Exchanges with the site are encrypted (HTTPS), and so is the database in transit.

Creating games: what we know about children.

Almost nothing, on purpose. A child never has to give their name or email: an adult creates the group and gives them its code.

What we keep

  • Child: a nickname, the group they joined, the games they publish and their scores.
  • Adult (workshop leader, teacher, parent): their email, to send them the sign-in link (no password), and the groups they have created.

What is sent to Mistral AI

  • The sentence typed and the settings of the current game. Nothing else: no nickname, no group, no IP address of the child.
  • Mistral AI is a French company; its servers are in Europe.

Against abuse

Fully open source.

Nothing is hidden. The console code, the site, the board and case designs: everything is on GitHub, free to read, modify and rebuild.

See the whole project on GitHub ›

Support the project.

You don’t need to buy a console to help. Give what you like, when you like: every euro pays for open-source development time.

€

My basket.

  1. 1. Basket
  2. 2. Delivery
  3. 3. Payment
Summary

Next step: delivery (account and pickup point), then payment.

2. Delivery · my account

No password: you receive a sign-in link by email. We don’t keep your address.

✅ Signed in · sign out · delete my account

2. Delivery · my pickup point

Delivery only to a Mondial Relay pickup point (4.90 €).

3. Payment

On Stripe’s secure page: there you give your card, the name for collecting the parcel and a phone number for the arrival notice. None of this goes through our server.

By paying, you accept our terms of sale. The console must be used under adult supervision.

Support · assembly and getting started

Need information?
It’s here.

Which way round each part goes

The ESP32-C3 on the back (QR code side), chip visible and USB-C on the flat edge; the screen and buttons on the front.

Brique console: which way round to fit the parts Hexagonal board (version D) - the ESP32 goes on the BACK, the screen and buttons on the FRONT 1. Identify the two sides the QR code is on the back IO21IO20GNDGNDGNDGNDIO0IO8 SCREEN FRONT: screen + 3 buttons 10kID ESP32 pins of the screen BACK: ESP32-C3 (+ QR code) 2. The ESP32-C3 on the back solder it first, board lying flat 10kID 0 21 1 20 2 10 3 9 4 8 3.3 7 G 6 5V 5 USB-C at the bottom, on the flat edge chip and buttons visible (facing you) The right way round, seen from the back: ✓ chip visible USB-C at the bottom, sticking out past the flat edge back ✗ flipped over chip against the board ✗ upside down USB-C pointing up Solder 1 corner, check it is straight, then the 15 other half-holes 3. On the front: the buttons, then the screen turn the board over, QR code underneath IO21IO20GNDGNDGNDGNDIO0IO8 Left Right Jump screen panel facing you GND VCC SCL SDA RES DC CS BL pins on the right The screen seen from the side: panel (front, facing you) board solder on the back Buttons flat, legs on the left and right 2 small ones on the left, the big one (Jump) on the right Screen: the 8 pins go through the board GND at the top, BL at the bottom (as on the board) Keep it parallel: solder 1 pin, check, then the 7 others, on the back 4. Check before plugging in No solder bridge between two neighbouring pins (ESP and screen) With a multimeter: no continuous beep between 3.3 and G (see the test sheet) Plug in the USB-C: the title screen shows the right way up, Left / Right / Jump respond Drawing taken from the PCB pcb-polygon-ajoure-D - generated by make_fiche_assemblage.py
  1. Identify the sides. Screen and buttons on the front, ESP32-C3 on the back (USB-C port towards the edge, within reach).
  2. Solder the ESP32-C3 on the back (QR code side), chip visible and USB-C on the flat edge. Solder just one pin first, check it lies flat, then solder the rest.
  3. Solder the buttons on the front: Left and Right on the left, Jump (the big one) on the right.
  4. Solder the screen on the front, making sure it is parallel to the board before soldering all the pins.
  5. Perfboard only: run the wires on the back following the table, then connect one leg of each button to GND.
  6. Check: no solder bridge between two neighbouring pins; with a multimeter, no contact between 3V3 and GND.
  7. Fix the board into the case (4 mounting holes, aligned with the screen).

The Brique console

A console you solder yourself: an ESP32-C3, a 2" TFT screen and 3 buttons. Once built, it runs Pixel Run and receives the levels created here over a USB cable.

Pre-soldered console? It arrives assembled and tested: go straight to plugging in the USB and sending your first game. The soldering steps below only apply to the kit.

About 1 h 30 of assembly for a supervised child (ages 9 to 14), then 10 minutes for the first programming.

Parts and tools

QtyPartDetails
1ESP32-C3 Super MiniMicrocontroller, USB-C port
12" ST7789 TFT screenSPI, 320×240, 7 pins (GND, VCC, SCL, SDA, RES, DC, CS)
26×6 mm push buttonLeft, Right
112×12 mm push buttonJump
1Base boardPerfboard (V1) or hexagonal PCB (V2)
~15Thin wiresOnly for the perfboard
1USB-C data cableNot a charge-only cable

Tools: soldering iron (~330 °C), solder, side cutters, multimeter (recommended), safety glasses.

For programming: a computer with Chrome or Edge.

Pin wiring

Standard wiring, the one used by the main firmware: each wire links a pin of the screen or a button to a pin of the ESP32-C3.

ComponentPinESP32-C3
ScreenGNDGND
ScreenVCC3V3
ScreenSCL (clock)GPIO 4
ScreenSDA (data)GPIO 6
ScreenRESGPIO 10
ScreenDCGPIO 5
ScreenCSGPIO 7
Left buttonone legGPIO 2
Right buttonone legGPIO 1
Jump buttonone legGPIO 3
The 3 buttonsother legGND

No resistors for the buttons: the firmware switches on the ESP32’s own.

First start-up

Everything is done from this page, in Chrome or Edge on a computer: nothing else to install.

  1. Plug the console in by USB.
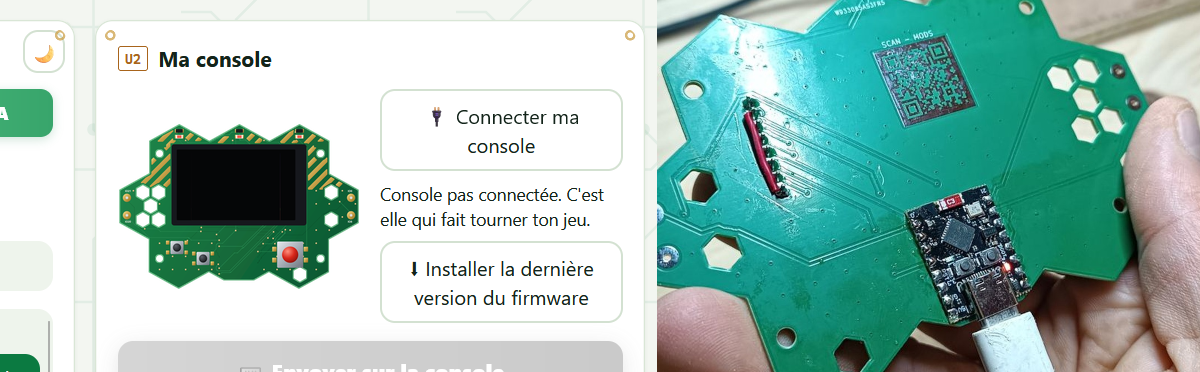
  2. 🛠 Create tab, 🔌 Connect my console, choose the port, then “⬇ Install the latest firmware” (about 1 minute).
  3. On the very first start-up, the console prepares its memory for a few seconds: normal, and only once.
The My console panel with the Connect my console and Install the latest firmware buttons, next to the console plugged in by USB-C

To check: the title screen shows the right way up · Left/Right move the selector · Jump confirms · “1 Joueur” (1 player) starts level 1.

🔋 Powering the console

No need for the computer to play: a simple phone power bank is enough.

  1. Plug the power bank into the console’s USB-C port with a phone charging cable (USB-A → USB-C or USB-C → USB-C).
  2. The console starts on its menu by itself: Jouer (Play) launches the last game received.

The console uses very little power: a 5,000 mAh power bank lasts far longer than a workshop day. If the console switches off by itself after a few seconds, the power bank is cutting out because it thinks nothing is plugged in: press its button, or use a power bank with a “small devices” mode (earphones, watches). To send a new game, you need to plug back into the computer.

Programming your console

Chrome or Edge on a computer, Arduino IDE and serial monitor closed, console on its home screen or in a menu.

  1. Connect: plug in the USB cable, 🛠 Create tab, 🔌 Connect my console, choose the port. The first time, install the game engine (“Install” button, about 1 minute).
    📷 Screenshot to add: Create → 🔌 Connect my console, choosing the port
    images/tuto-1-connecter.png
  2. Describe your game in your own words, then Send: the AI writes the program and the console runs it straight away.
    📷 Screenshot to add: the written request and the Send button
    images/tuto-2-decrire.png
  3. Grow the game request after request. If the console reports an error, the AI receives it with the next request.
    📷 Screenshot to add: the request history
    images/tuto-3-grandir.png
  4. Play again later: console menu → Jouer (Play: the last game received, kept even when switched off). Hold G + D for 1 s to return to the menu.
    📷 Screenshot to add: the Jouer menu on the console
    images/tuto-4-rejouer.png

Troubleshooting

SymptomLikely causeSolution
Black or white screenSCL/SDA/DC/CS wire swapped, or a dry jointCompare with the table, redo the screen’s solder joints
A button doesn’t respondLeg not soldered or not connected to GNDResolder, test with a multimeter
The ESP32 gets hotBridge between 3V3 and GNDUnplug straight away, look for the bridge
No port offeredCharge-only cableUse another USB cable
“Port busy”Arduino IDE or serial monitor openClose them, try again
“Console busy”2-player game, world or mini-game in progressGo back to the console’s home screen
“No response”Old firmware without USB readingReinstall from 🔌 Connect my console → “Install”
“Level too big”Level too tallAsk for a shorter level
Upload failsUnreliable USB linkHold BOOT while plugging in, or esptool --no-stub
Icon search returns nothingSchool network filterAllow api.iconify.design

Multimeter test sheet (V1 console)

Console unplugged, multimeter in continuity mode (beep). One line to tick per wire, then look for solder bridges between neighbouring pins.

V1 console: test sheet (continuity + troubleshooting) Console UNPLUGGED from USB - multimeter in continuity mode (beep) - tick each line 1. Identify the pins same layout as montage-c3-tft.svg USB-C ESP32-C3 SuperMini GPIO0 GPIO21 GPIO1 GPIO20 GPIO2 GPIO10 GPIO3 GPIO9 GPIO4 GPIO8 3V3 GPIO7 GND GPIO6 5V GPIO5 Check against the markings printed on the board ST7789 320x240 1 GND GND 2 VCC 3V3 3 SCL GPIO4 4 SDA GPIO6 5 RES GPIO10 6 DC GPIO5 7 CS GPIO7 8 BLK 3V3 1 2 LEFT GPIO2 / GND 1 2 RIGHT GPIO1 / GND 1 2 JUMP (big) GPIO3 / GND leg 1 = GPIO wire leg 2 = GND 2. Must BEEP probe A on the board, probe B on the screen / button GPIO4 ↔ screen SCL (3) GPIO6 ↔ screen SDA (4) GPIO10 ↔ screen RES (5) GPIO5 ↔ screen DC (6) GPIO7 ↔ screen CS (7) 3V3 ↔ screen VCC (2) 3V3 ↔ screen BLK (8) GND ↔ screen GND (1) GPIO2 ↔ LEFT button, leg 1 GPIO1 ↔ RIGHT button, leg 1 GPIO3 ↔ JUMP button, leg 1 GND ↔ the 3 buttons, leg 2 GPIO2 ↔ GND: ONLY with the LEFT button pressed GPIO1 ↔ GND: ONLY with the RIGHT button pressed GPIO3 ↔ GND: ONLY with the JUMP button pressed 3. Must NOT beep (solder bridge) neighbouring pins: if it beeps, redo the solder joint 3V3 ↔ GND board: short beep = capacitor (normal), continuous beep = short circuit GPIO1 ↔ GPIO2 board GPIO2 ↔ GPIO3 board GPIO3 ↔ GPIO4 board GPIO4 ↔ 3V3 board GPIO10 ↔ GPIO9 board GPIO7 ↔ GPIO6 board GPIO6 ↔ GPIO5 board GPIO8 ↔ GPIO7 board GPIO1 / 2 / 3 ↔ GND buttons released SCL ↔ SDA screen SDA ↔ RES screen RES ↔ DC screen DC ↔ CS screen CS ↔ BLK screen VCC ↔ SCL screen 4. Symptom -> what to test first Screen completely black, no light VCC, BLK, GND of the screen; 3V3 and GND of the board Screen lit but plain white or black SCL, SDA, CS, DC, RES; then the firmware: V1 = main sketch (not proto-0-4) Scrambled picture, wrong colours DC (GPIO5) and SDA (GPIO6); bridges SDA-RES, RES-DC, DC-CS A button does nothing its GPIO wire -> leg 1, and leg 2 -> GND; test with the button pressed The character moves by itself short circuit GPIO -> GND (button released) or bridge GPIO1-GPIO2-GPIO3 Not recognised over USB, gets hot short circuit 3V3 -> GND or 5V -> GND: unplug straight away Pinout: materiel/pinout-format1.txt - generated by make_test_continuite.py

Workshop · Brique in the classroom

They build.
They create. They learn.

Electronics as a teaching aid, for fun learning.

🔧 Soldering kit · 📦 Pre-assembled kit

Pupils solder their console, or start straight away with a console that is assembled and tested.

🤖 Development workshop with AI

Each pupil describes their game to the AI, tests it on their console, corrects it and tries again.

📚 Several levels of teaching

1. Language: prompting in French, English or Spanish.

2. Lesson questions: the teacher adds them and they are automatically inserted into the children’s games. They appear between levels, passed or not, and must be answered to progress.

📚Brique in the classroom: the workshop

Pupils build their console, create their games by talking to an AI, and each game picks up the lesson of the day: your lesson questions appear between levels.

Ages 9 to 14 · groups of 8 to 30 · from a single session to a year-long project.

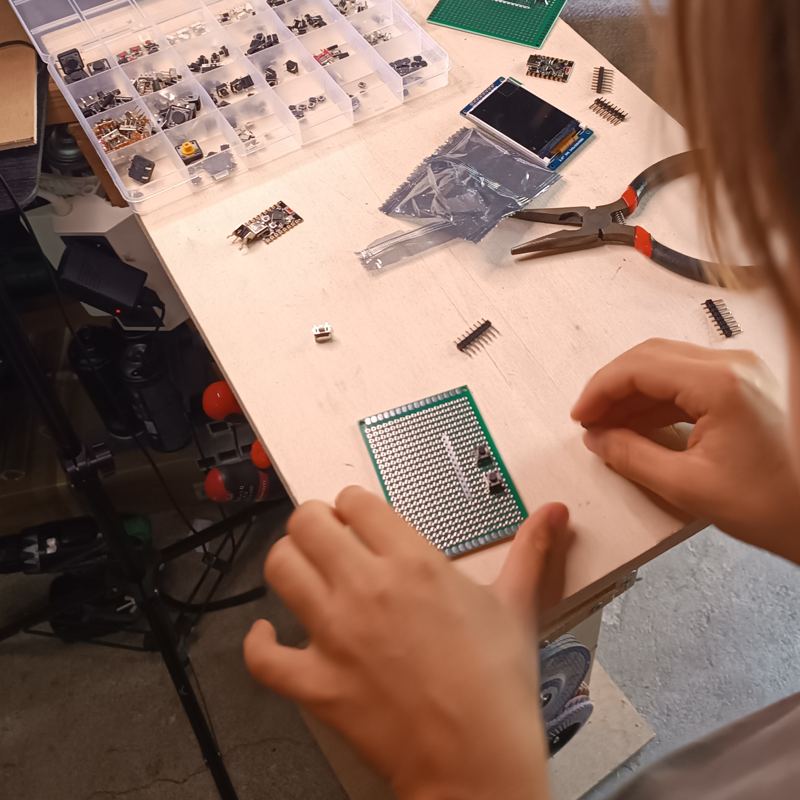
In the workshop, from perfboard to console

The perfboard
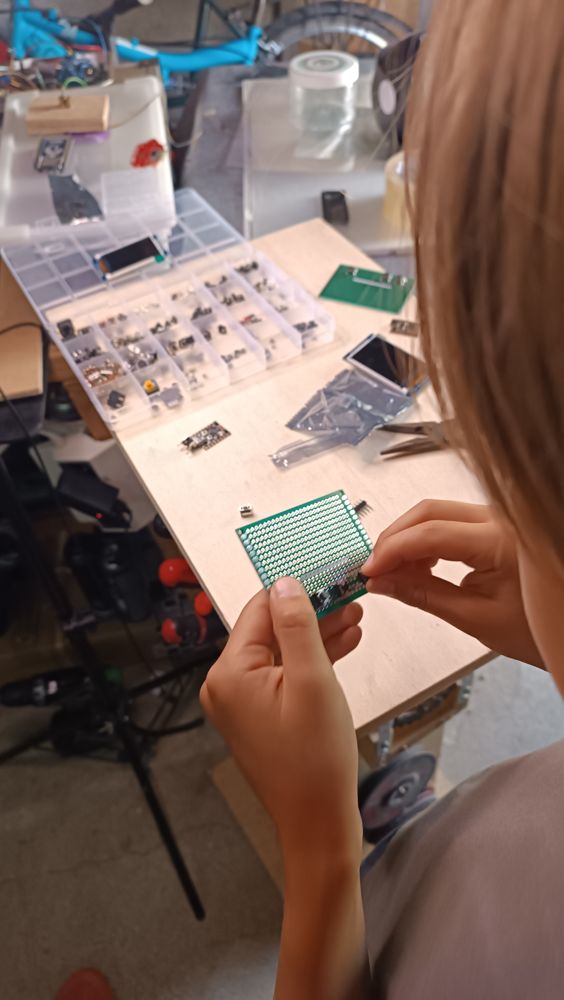
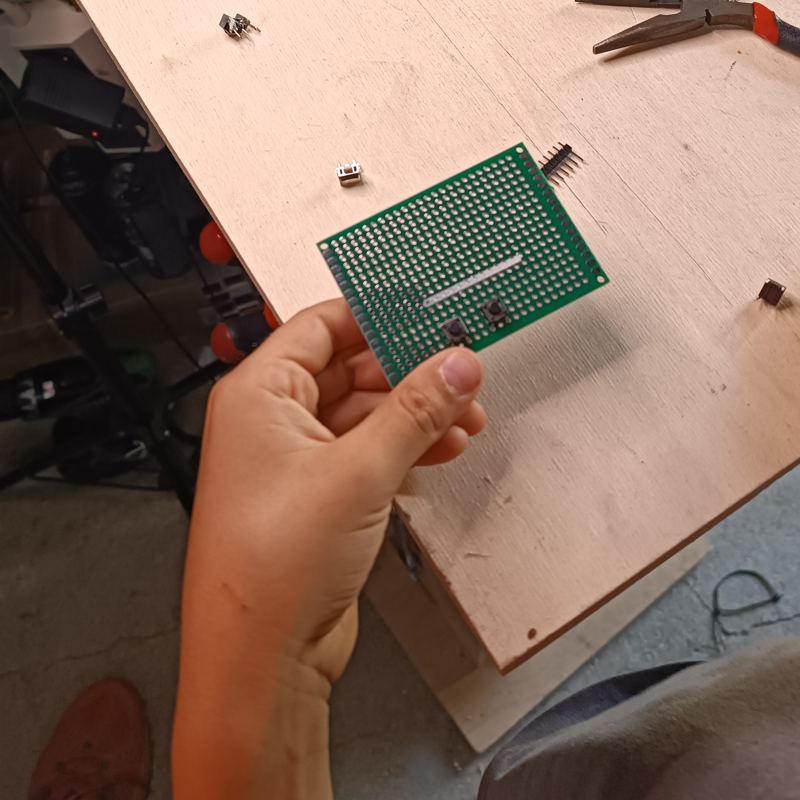
The perfboardA prototyping board in hand: it all starts here.
The components
The componentsScreen, buttons, connectors: getting the workbench ready.
Soldering
SolderingIron in one hand, solder in the other, the board held in a stand.
Step by step
Step by stepEvery pin soldered, one by one, with care.
The screen is on
The screen is onThe console takes shape on the stand.
It lights up!
It lights up!The first game runs on the screen: everyone’s favourite moment.
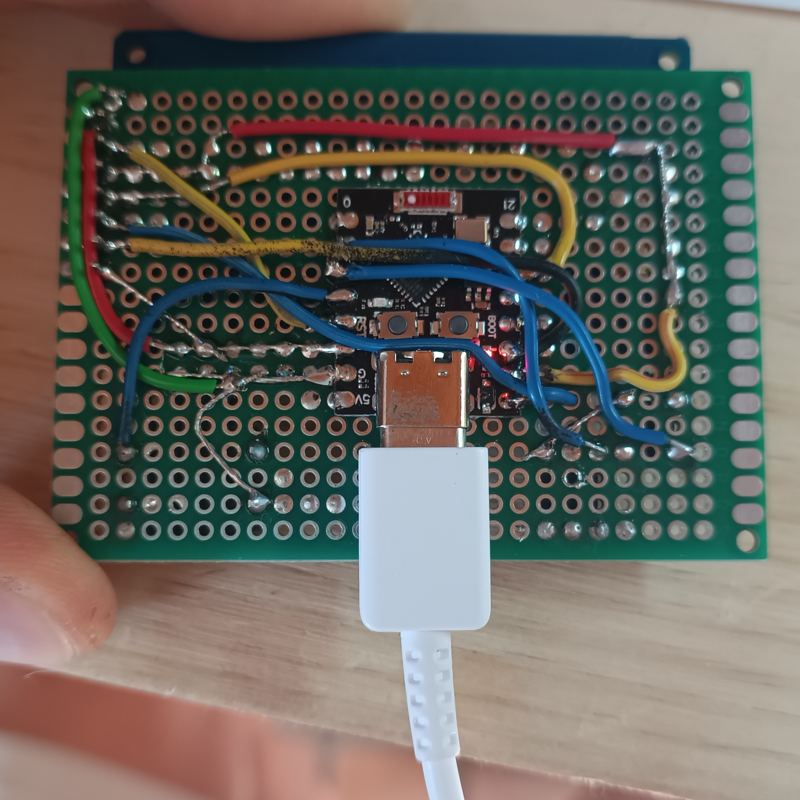
The wires underneath
The wires underneathThe wiring seen from below: each wire links a pin to the ESP32-C3.
The Brique board
The Brique boardThe hexagonal printed circuit board replaces the wires: easier to build.
The finished consoles
The finished consolesEveryone leaves with their own, and their games inside.
The Brique console
The Brique consoleColour screen, three buttons, an ESP32-C3 brain.

Hands-on workshop

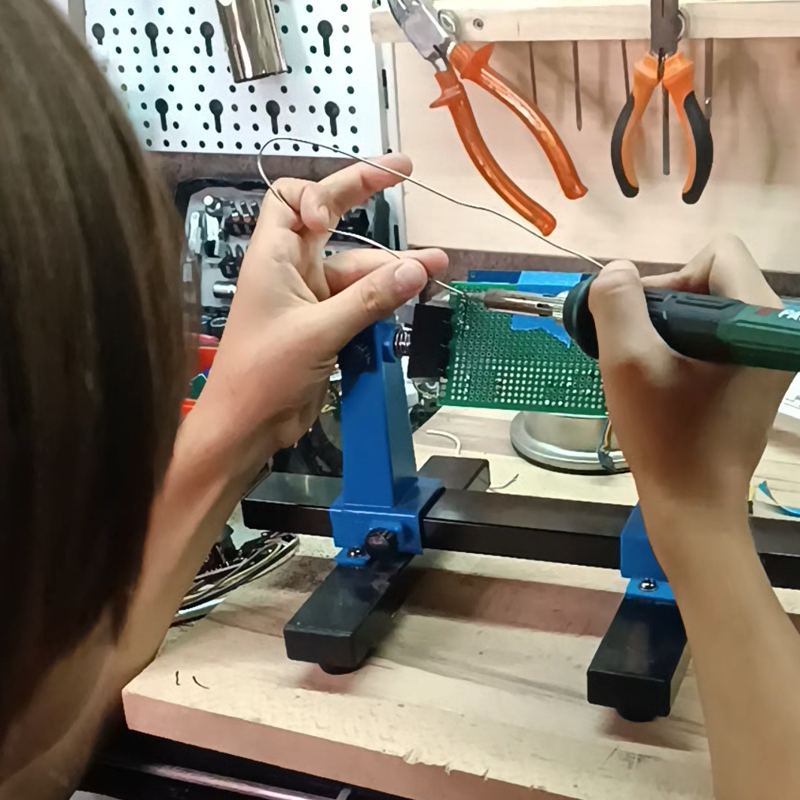
Soldering the console in a workshop, the board held in a stand

Each pupil builds their console: ESP32-C3 microcontroller, colour screen, three buttons, soldering and assembling the case.

Soldering not possible (age, equipment, time)? The console comes in a pre-soldered version, assembled and tested: the workshop starts straight with creating.

Understanding what is inside a digital object, following an assembly plan, working carefully and safely (safety glasses, supervised soldering iron).

Customisation

The world, the hero, the colours, the enemies, the scenery: each pupil composes their universe, looks for images and names their game.

Making aesthetic choices, searching for and selecting images, presenting their creation to others.

Coding with AI

The pupil describes their game in plain language (“a very tall volcano with springs and 3 lives”). The AI turns it into settings, the pupil tests it on their console, corrects their request and tries again.

Expressing things precisely, testing and correcting (trial and error), looking “under the bonnet” at the code produced, understanding what an AI can do… and what it can’t: impossible requests become “players’ ideas”.

The teaching layer

In the Leader area, you write your lesson questions (multiple choice, 2 or 3 answers). They are automatically inserted into all the group’s games: between two levels, passed or not, the console asks a question that must be answered to continue, and shows the right answer after a mistake.

French, maths, English, history, science… The lesson becomes the key to the game, revised with every play, including when playing a classmate’s game. You track the rate of correct answers per question.

Workshop mode

On workshop day, switch on the group’s workshop mode and enter the subject of the day: your pupils only see their group’s games (not the public community or the shop), and their creations stay private to the group.

A French teacher runs a French session, a maths teacher does maths: the games carry the lesson you chose.

Typical schedule

Soldering session: the iron and solder wire above the board
  1. Session 1 — assembling and soldering the console (skip with pre-soldered consoles).
  2. Session 2 — discovery: first guided game, sending it to the console.
  3. Session 3 — free creation with the AI, customisation, lesson questions.
  4. Session 4 — publishing, swapping games by code, multiplayer races.

Framework and safety

Pupils have no account and no email address: a nickname and the group code are enough. Only the adult signs in (link received by email). You can hide a game, delete an idea, free up a nickname.

No names, no photos, no messaging between pupils. Text displayed on the consoles is filtered.

Getting started

  1. Open the Leader area and create a group: you get a code (e.g. LUNE-42).
  2. Write your lesson questions and, if needed, switch on workshop mode.
  3. Pupils click “Sign in” → “Create an account”: a nickname, a password and this code.

Leader area

Your group,
at a glance.

Leader area

Enter your email address: you receive a sign-in link (no password). Children never give an email.

My groups

Signed in: · sign out

🛒 Shop orders

The name and phone number for the label are at Stripe (link on each order): we don’t copy them here.

Your nickname: not your real name! Password: at least 6 characters.

Forgotten your password?
Adult (leader, parent, order): sign in by email

No password: you receive a sign-in link by email. It opens your leader area and your orders.

⚠️

Create · your game in one sentence

You describe your game.
The AI builds it.

I describe my game the AI builds it

Which game?

I start from…

📋 My game sheet, as the console reads it

      🧑‍💻 Expert mode: write the sheet myself

      The world

      My hero

      The course

      Height

      Danger

      Width

      Height

      A ceiling

      Hidden holes (they open at the last moment)

      Platforms

      Size

      Terrain

      Holes

      Pattern

      Steel bricks (unbreakable)

      How many waves

      And also…

      width: 1 to 4 screens
      height: 1 or 2 screens
      ceiling (or not)
      hidden holes
      platforms (or not)
      spikes, hidden spikes, enemies, stars
      a door at the end
      difficulty
      size: 6 to 12 squares
      terrain: flat, hills, mountains
      holes
      spikes, pop-up spikes, hidden spikes
      stars
      a flag at the far end
      difficulty
      lives, timer

      What the sheet can do

      buttons G (left), D (right), P3: go left / right / up / down, jump, shoot, turn, move one square
      hero: speed, momentum, jump height, mid-air jumps, wall slide and wall jump, lives
      world: gravity (0 = nothing falls), edge (wall, void, wrap), camera (follows, fixed)
      bricks: solid, deadly, slippery, bouncy, vanishing, collectable, finish
      objects: spike, saw, block, enemy, projectile; fixed, back-and-forth, loop, patrol, falls, follows; starts when you get close; hidden
      contact: lose, bounce, collect, lose a life, nothing (a moving block = platform); squashed from above
      rules: when you touch a letter / everything is collected / everything is squashed / after … s / at … points, then win, lose, open, close, gain a life, show a message, go faster
      goal: reach the finish, collect everything, squash everything, survive … s, or the rules
      pattern: full, pyramid, chequerboard, frame, random
      speed (slow / fast)
      difficulty
      lives
      steel bricks
      no bonuses
      number of waves

      The bricks the AI can use

      # floor / wall
      R spring
      ^ spike
      H hidden spike
      W saw
      C fragile block
      I ice
      * star
      G finish

      Settings

      height (short / tall)
      difficulty
      gravity (moon / heavy)
      speed (slow / fast)
      double jump
      course: tower, shaft, stairs, islands, mixed
      height: 1 to 5 screens
      Choose, write a sentence, then press “Create”.

      🎨 My icons (optional): choose what to replace

      …or find an image on the web: right-click → “Copy image”, then Ctrl+V here.
      You can also drag it here or .

      🌈 My colours (optional)

      Sky
      Platforms

      ⚙️ My rules (optional)

      Goal
      Timer
      Lives
      Victory

      My level

      To play, send your level to the console: the console is what runs the game.

      🔄 Update my console

      Your console’s version number shows on its start-up screen (e.g. “v55.3 - appuie sur un bouton”); plug it in here so we can compare.

      The new version of the console’s game. Warning: you start again from level 1 (levels, coins and skins are reset); your games in “Mes niveaux” (My levels) are kept. Chrome or Edge on a computer, USB cable plugged in, about 1 minute.

      This browser can’t update the console: open the page in Chrome or Edge, on a computer. The page must be opened over https (or on localhost).

      Console not found? Unplug it, hold its BOOT button, plug it back in, then try again.

      🔧 Look under the bonnet


      What I did

      Your attempts will appear here: what you asked for, what happened, what you want to fix.

      AI agent you describe, the AI writes the program

      What you ask for, what the AI did and what the console says about it will appear here.

      </> Program code
      Write what you want to create, then press “Send to the AI”.

      🚀 Here you learn to describe what you want and to improve your game bit by bit. To go further: ask your own AI agent for your code, edit it with them, then paste it here (“</> View code”) to put it on your console.

      My console

      The Brique console
      Console not connected. The console is what runs your game.
      This browser can’t talk to the console: open the page in Chrome or Edge, on a computer. The page must be opened over https (or on localhost).
      📝 Leave a note for the Brique team

      🖼 Your game’s images

      Drag an image or an animated GIF here (from the web or your computer), paste it with Ctrl+V, or .
      It becomes 16-colour pixel art for the console. Then tell the AI what it is for: “image 1 is my hero”.

      ✏️ My drawing

      px

      🎯 I place my level

      Drag a platform to move it, its white dot to make it longer. This changes the first level.